
This is a guest post by David Darnes, creator of the Alembic theme.
In Part 1, I gave an overview of creating themes for Jekyll and a few tips for when you’re developing your own theme. In this second part, I’m going to give a full step-by-step guide to developing your own Jekyll theme gem.
Getting Setup
Before we get stuck in, you’re going to need a couple of things. It’s good to have at least a basic understanding of Jekyll; the file structure is very similar to making a Jekyll site, as is the development process. Unsurprisingly, you’ll actually need Jekyll as well, which can be installed using Ruby. For Mac users, this will be quite straightforward, as Ruby comes preinstalled. This means you can just use the following command in your command line tool of choice:
$ gem install jekyll
You can use the following article if you’re trying to install Jekyll on a Windows machine.
If you’re planning for your user base to use Siteleaf or GitHub Pages, you can install the official GitHub pages-gem, but make a note of the specific gems you’re using, as you’re going to need them later in the development process. You should also install Bundler, which will help you to manage all the gems you are using in your gem theme.
Finally, create an account on RubyGems.org - you’ll need this account later on when you want to submit your theme gem so others can install it easily.
Getting Started
To begin, initialize a new boilerplate theme using this handy command that’s built directly into Jekyll:
$ jekyll new-theme my-theme
This will build out all the files you’ll need for your theme into a new directory with the same name you chose in the command (in my example, I just put my-theme).
We need to add some additional information to the theme before we can move on: a summary and a URL that it’s related to. Open the newly generated .gemspec file (named the same as your theme name) and locate the lines marked spec.summary and spec.homepage:
spec.summary       = %q{A short description of my theme}
spec.homepage      = "http://website.com"
In my code example above, I’ve added a summary for my theme within the brackets, as well as a homepage that people can reference to get more information about my theme. After we’ve edited and saved these changes, we’ll need to install the gems that our theme depend on.
If you look further down in the .gemspec file, you’ll see some lines starting with spec.add_runtime_dependency and spec.add_development_dependency. These are where we can add the gems our theme needs in order to work, runtime gems for when the theme is being used and development for when the theme is being developed. To install these gems, use the following command:
$ bundle install
To preview your theme and to make sure it’s working as expected, create a new file in the root directory of theme called index.html with something like the following:
---
title: Home
layout: default
---
# Welcome
Adding this file will allow you to build and view your Jekyll theme locally, as if it was a regular Jekyll site. To build and serve, use the following command:
$ bundle exec jekyll serve --watch
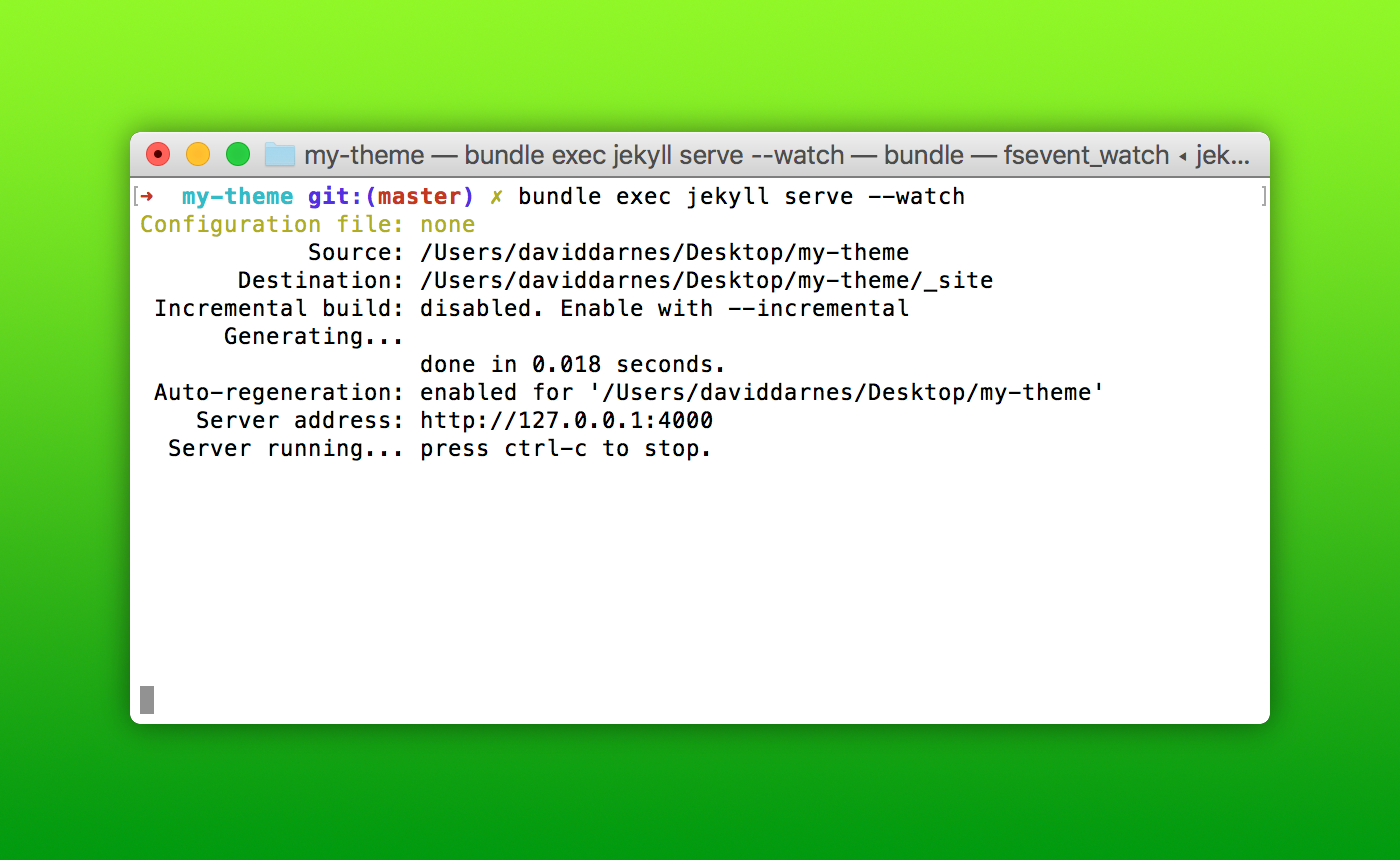
Some of you may have just used jekyll serve --watch to run your jekyll site before. The bundle exec part at the beginning ensures that we use the gems stated in the Gemfile, which in turn is pointing to the .gemspec file. This means that we will be using the same gems that we’ll be providing for the user when they come to use your theme.
Directory Structure
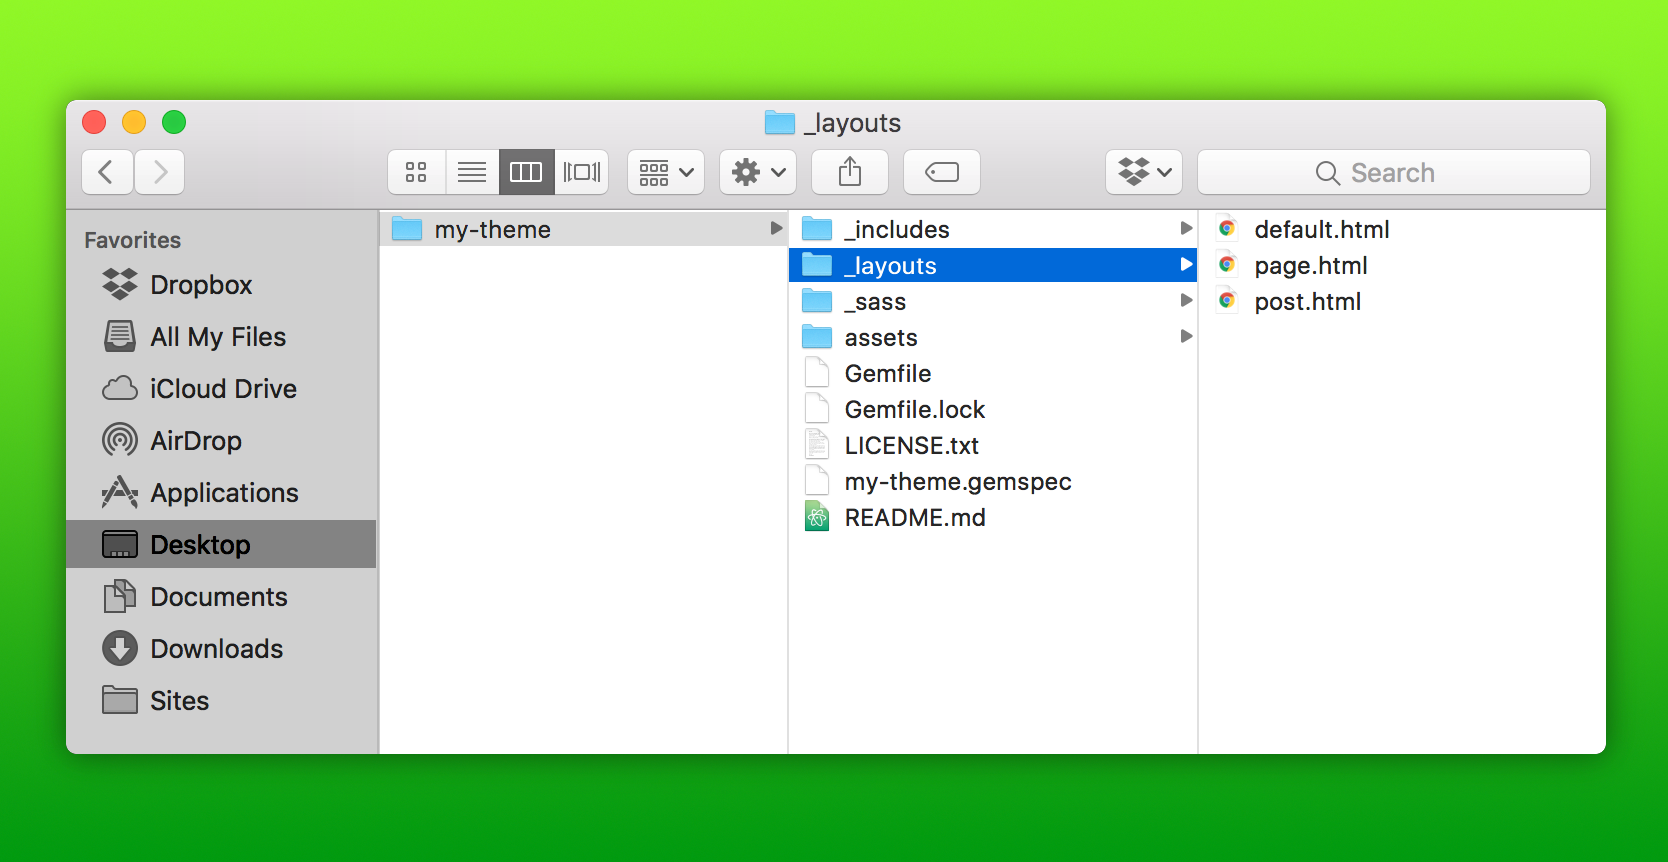
To provide some context, allow me to run through the files and folders within your newly created theme:
- An
_includesfolder, which will be empty until you start adding template partials - A
_layoutsfolder, which will contain adefault.html,post.htmlandpage.htmltemplate to get started with - A
_sassfolder, which is also empty and will contain your style partials - An
assetsfolder, also empty. This will contain any static files or at least files that you’ll want to directly link to in the final site, such as graphical assets. This is also where you can place the mainstyles.scssfile, which will be outputted tostyles.css. You can then directly link to it with ease in your layout files - A
Gemfile- this is what Bundler will refer to for gems, but is already set up to point to the.gemspecfile - A
theme-name.gemspecfile, which is where all gems and other vital information about your theme is stored. Version number, author name and email, theme name and dependant gems are all set here. This is where you can set what files are included in your gem - look for the line markedspec.filesto do so. I wouldn’t recommend editing this, however, as it’s been specifically set to meet a standard Jekyll theming convention - A
LICENSE.txtandREADME.mdthat contains your desired license for your theme and all your theme documentation, respectively. It’s important to document your theme, as mentioned in the first part of this tutorial
So, that’s your entire theme structure - everything else should just be sample content and should be ignored in your .gitignore file and by your .gemspec file.
Developing your theme
Hopefully, you’re feeling more comfortable with the codebase, and you can get stuck into developing your Jekyll theme gem. As you’re working on your theme, keep in mind the points from Part 1 of this tutorial. Make sure to keep note of the gems you’re using in conjunction with your theme and add them to your .gemspec file. Gems that are built to work alongside Jekyll are actually Jekyll plugins. The Siteleaf team has compiled a handy list of Jekyll plugins that can be used on Siteleaf; additionally, you can use custom third-party gems with the Team plan, if you so wish.
Adding sample content
Earlier, we added an index.html file to test our build steps were working how we expected. This can also be used for testing sample content. However, we’re going to need more than a homepage to test the theme properly. Go ahead and add some sample posts in a new _posts directory. I recommend using actual articles rather than just placeholder text, as you won’t get the real life quirks of peoples’ content from Lorem Ipsum copy and other placeholders. Add images, code samples, and even videos into the content, too. It’s really important to test a variety of content, as you can never really guess what a theme user might add to their site.
Of course, at the core of any Jekyll site content structure is the configuration file (_config.yml). This is where you can provide a site name, description, and even default page settings. In my Alembic theme, I’ve added an example _config.yml file that people can use as a reference point for using it. If you want to know more about how to configure a Jekyll site with this file, and in turn, prepare your theme for such options, check the official Jekyll documentation.
Submitting your theme gem
Once you’re happy with the first iteration of your theme and you’ve pushed all your work to your repository, you can then build your first .gem file. A .gem file is your entire theme: that’s all the templating code and other working files compiled into one file. This is the file we will be pushing up to RubyGems.org.
To build your gem, use the following command in your command line tool:
$ gem build my-theme.gemspec
Once you’ve done this, a new file will appear in the root of your project - something along the lines of my-theme-0.1.0.gem. The file name is comprised of your theme name and the current version in your .gemspec file. Next, we need to push, and therefore publish, the gem. Use the following command to do so:
$ gem push my-theme-0.1.0.gem
When you submit a gem for the first time, your command line tool will ask you to provide your RubyGems.org login details. Once you’ve signed in, your gem will be pushed up and published! And with that, your first Jekyll theme gem has been created. You’ll then have a page on RubyGems.org, similar to my theme page.

GitHub Pages remote themes
Since releasing Part 1, GitHub have implemented a new feature to GitHub Pages that allows anyone to use any Jekyll theme uploaded to github.com without the need of any local build or deployment steps.
Installing a theme requires the use of a newly approved gem called jekyll-remote-theme. You add it to your Jekyll site just like any other gem plugin. After installing it, you can use the key remote_theme in your _config.yml, followed by the username of the theme creator and the name of the theme separated by a / - for example:
plugins:
    - jekyll-remote-theme

remote_theme: daviddarnes/alembic
So, how does this affect our theme development process? Well, you’ll need to consider if someone will be using your theme in this fashion if you upload it to GitHub. You should also make sure the plugins in your theme are also approved for GitHub Pages. Most importantly, you’ll need to factor in any changes that could break other peoples’ sites.
The remote theme plugin can hook into repo releases as well as branches. Using releases is a great way to manage versions of your theme and it’s ideal to help people lock down the version of your theme that they want to use:
remote_theme: daviddarnes/alembic@2.3.1
Testing and releasing updates
After your theme is live, you’ll need to do a couple of things to ensure your theme is doing the job you intended it to. The first thing to do is to test the theme, so try to install and use it like any other Jekyll theme. Take note of any hiccups you find or anything that the theme user may find difficult to grasp and implement.
If you need to make updates or fixes, you’ll want to increment the version appropriately of the theme in the .gemspec, produce another build and push the .gem file matching that version number to RubyGems.org.
Feel free to tweet me with any questions you have on what I’ve talked about. You can also chat with the Siteleaf community for further questions and to share your development work.