This post refers to a legacy version of Siteleaf.
Last week, I ran through a number of Siteleaf’s most compelling features and provided a general overview of the service. This week, I’ll hold your hand through creating a basic website using Siteleaf.
Creating your site
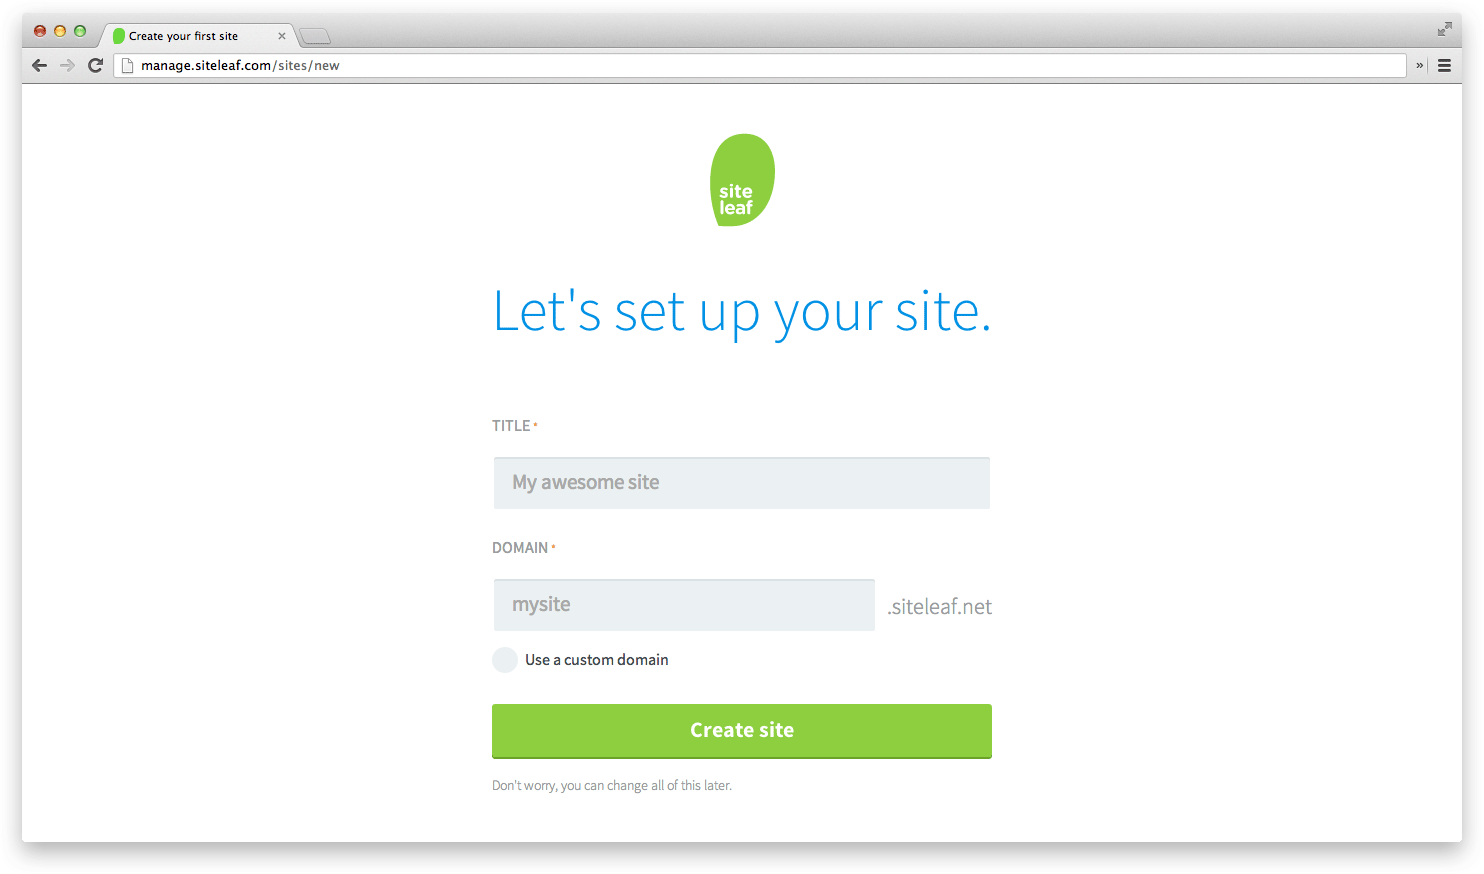
Assuming you’ve already signed up for a Siteleaf account, your first task is to create a site. Fill out your site’s title and domain name. If you’re just testing the waters, you can use a Siteleaf subdomain.
Configuring your site
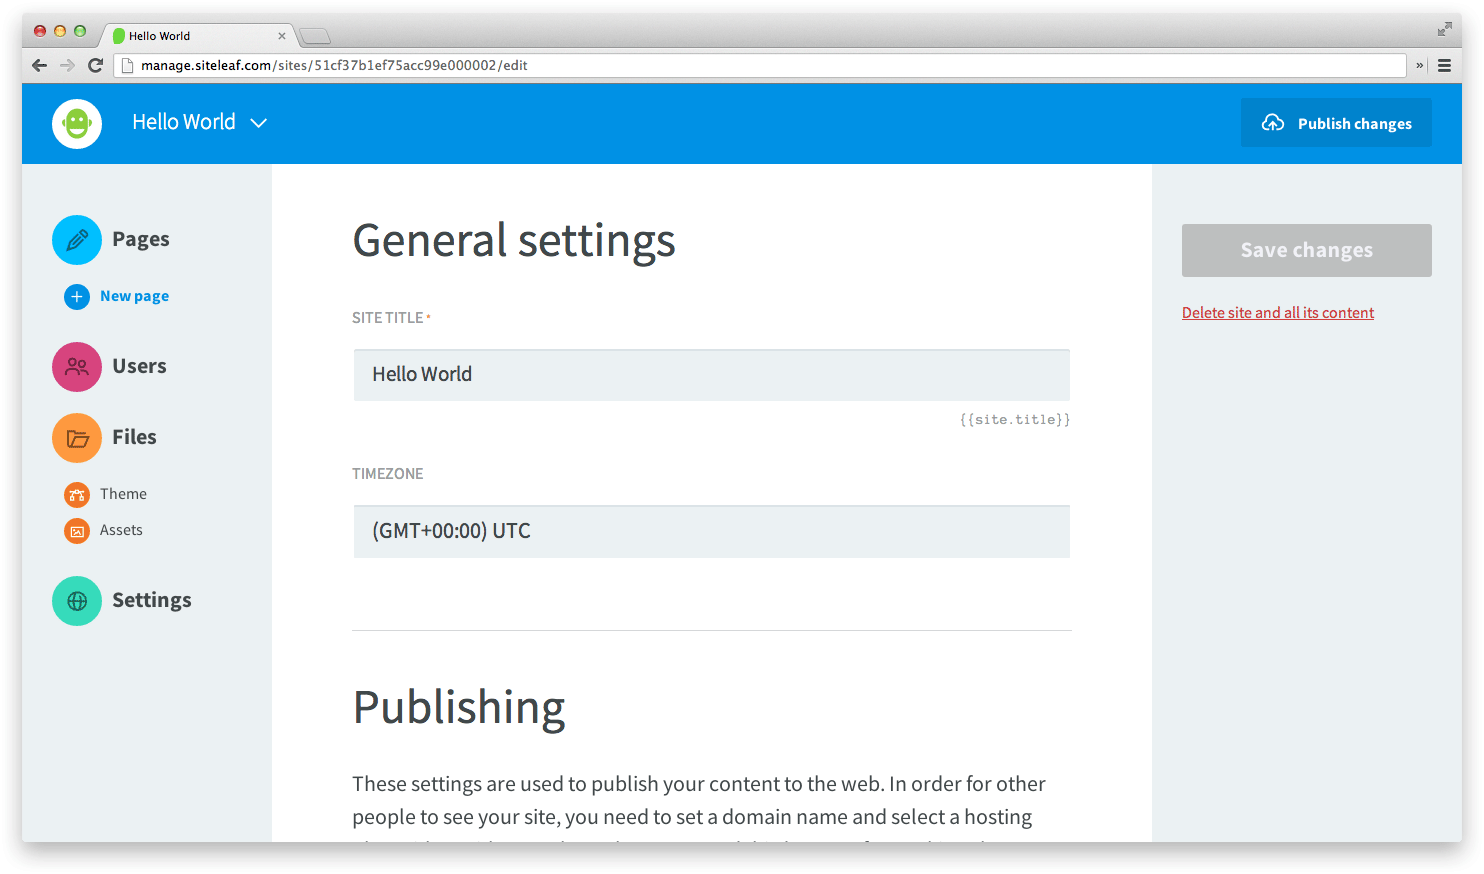
Once you create your site, Siteleaf will redirect to the site’s settings page. Here, you can edit its title, timezone, and publishing settings. You can also add site metadata, but I’ll hold off on that for now.
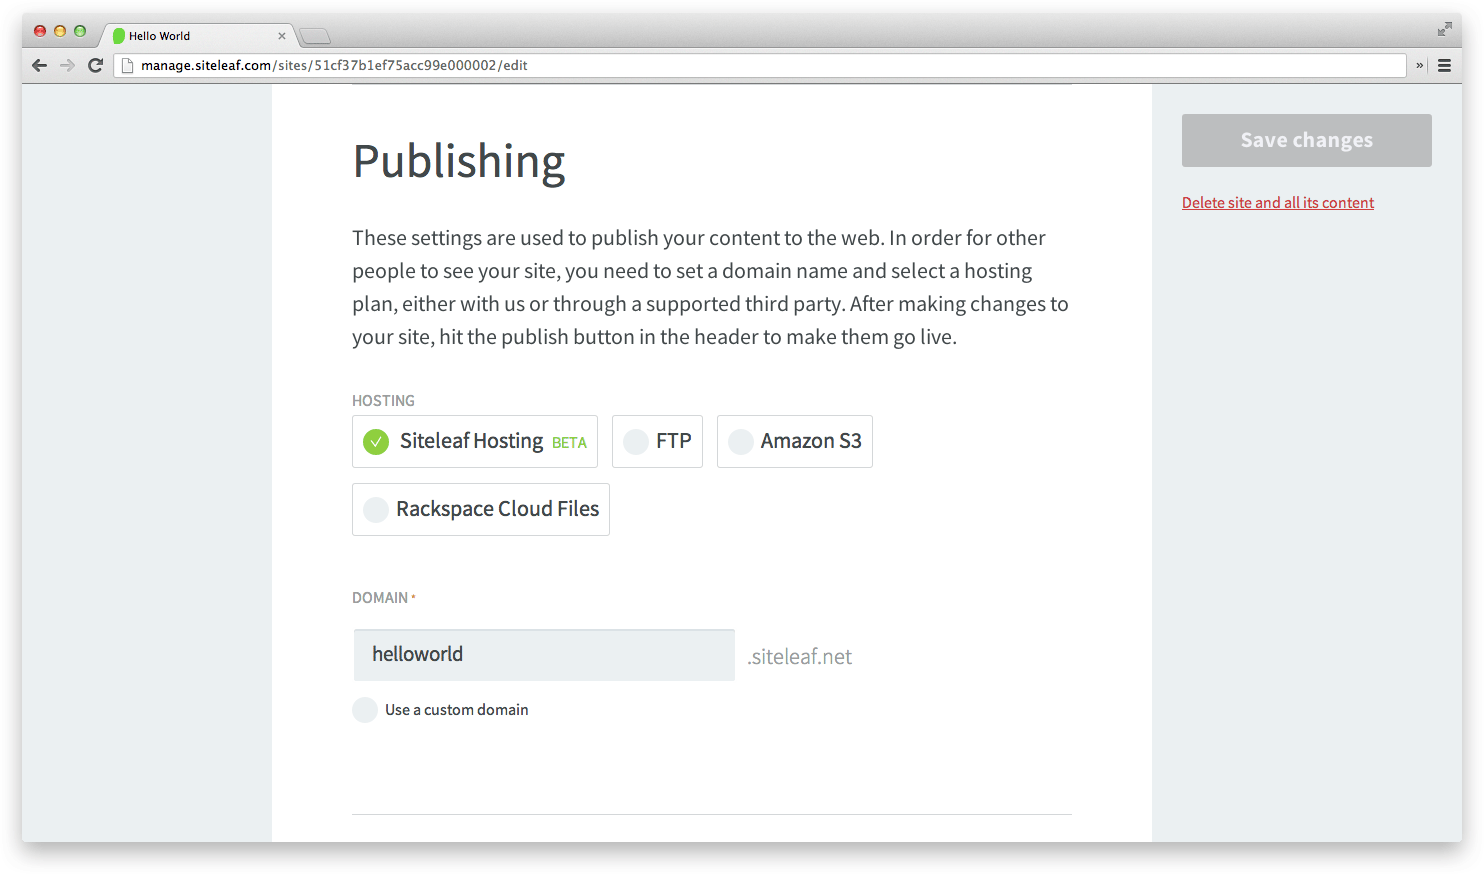
For publishing settings, we’ll go with Siteleaf’s free CDN hosting for now—it’s quick and easy for getting a site up with zero configuration. Siteleaf also allows publishing to FTP, Amazon S3, and Rackspace Cloud Files. I personally use S3 for its ability to handle heavy loads of traffic for just pennies a month.
Creating a page
On the left sidebar, you’ll find the top-level navigation for the current site. Here, you can also create new pages and rearrange existing ones through drag and drop. Let’s create our first page by clicking ‘New page’.
Note: the first page in the ‘Pages’ list is considered the ‘Home’ page. It is rendered at the root path of your website.
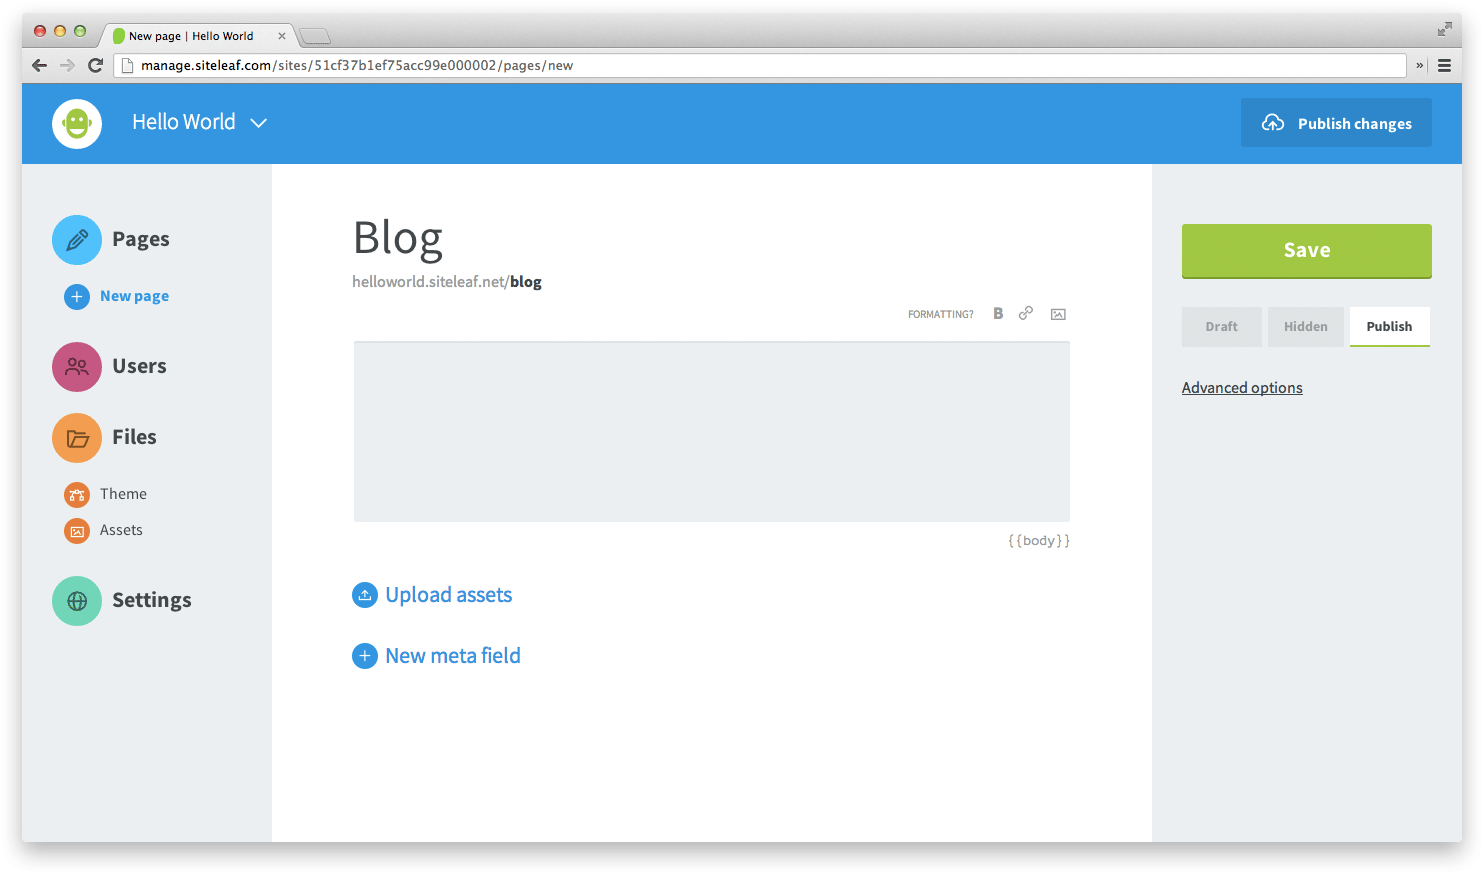
In the ‘New page’ view, we’ll start by assigning a title to our page. Let’s go with ‘Blog’. Notice that the slug automatically populates itself as we type. You can also manually specify the slug if your title is unfashionably long.
Save the page by clicking the massive green button on the right or by using the command+S hotkey. Now, we can preview the page by clicking the ‘Preview’ link just below the gigantic green save button.
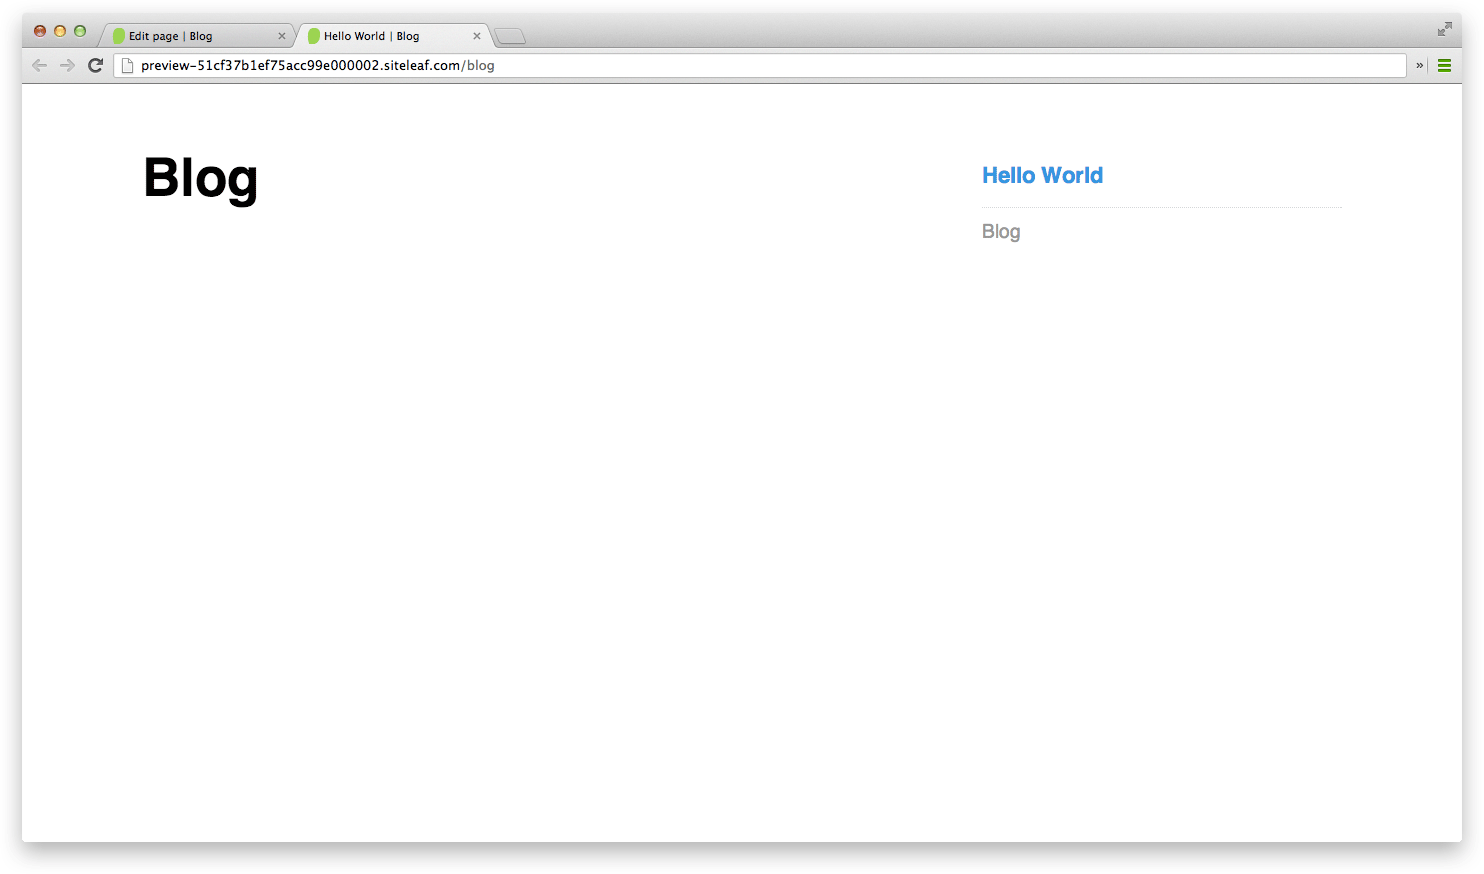
Siteleaf provides a bare bones theme by default, so you can at least preview your content before touching any code. Our blog looks pretty empty, so let’s create a post.
Creating a post
In Siteleaf, there are pages and posts. A site can have many pages. Pages can have many sub-pages. Pages can also have many posts. The difference between a page and a post is its ordering—pages can be reordered through drag and drop while posts are ordered by timestamps. The most common use of a post is for a blog, like the one we’re creating, but posts can also be used for archived content, like in the ‘Currently Brewing’ section of Café Jonnie.
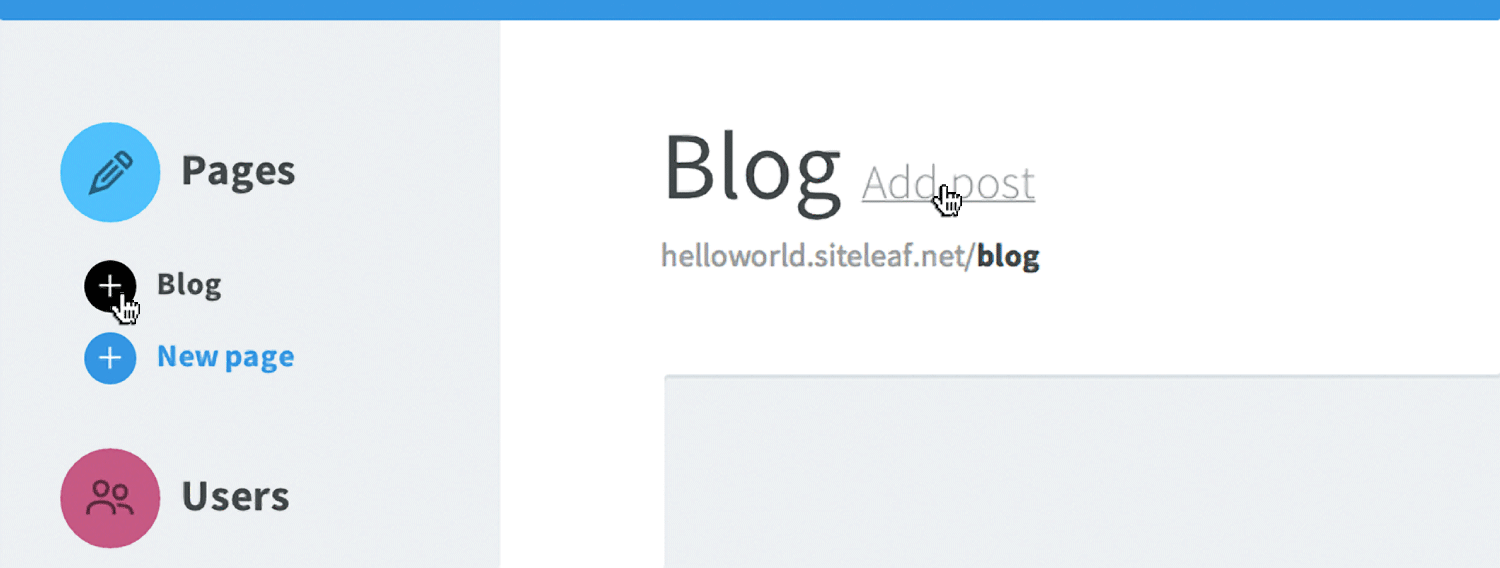
We can create a post for our blog by clicking either the ‘Add post’ link aside our title or the circle aside the ‘Blog’ page in the left sidebar.
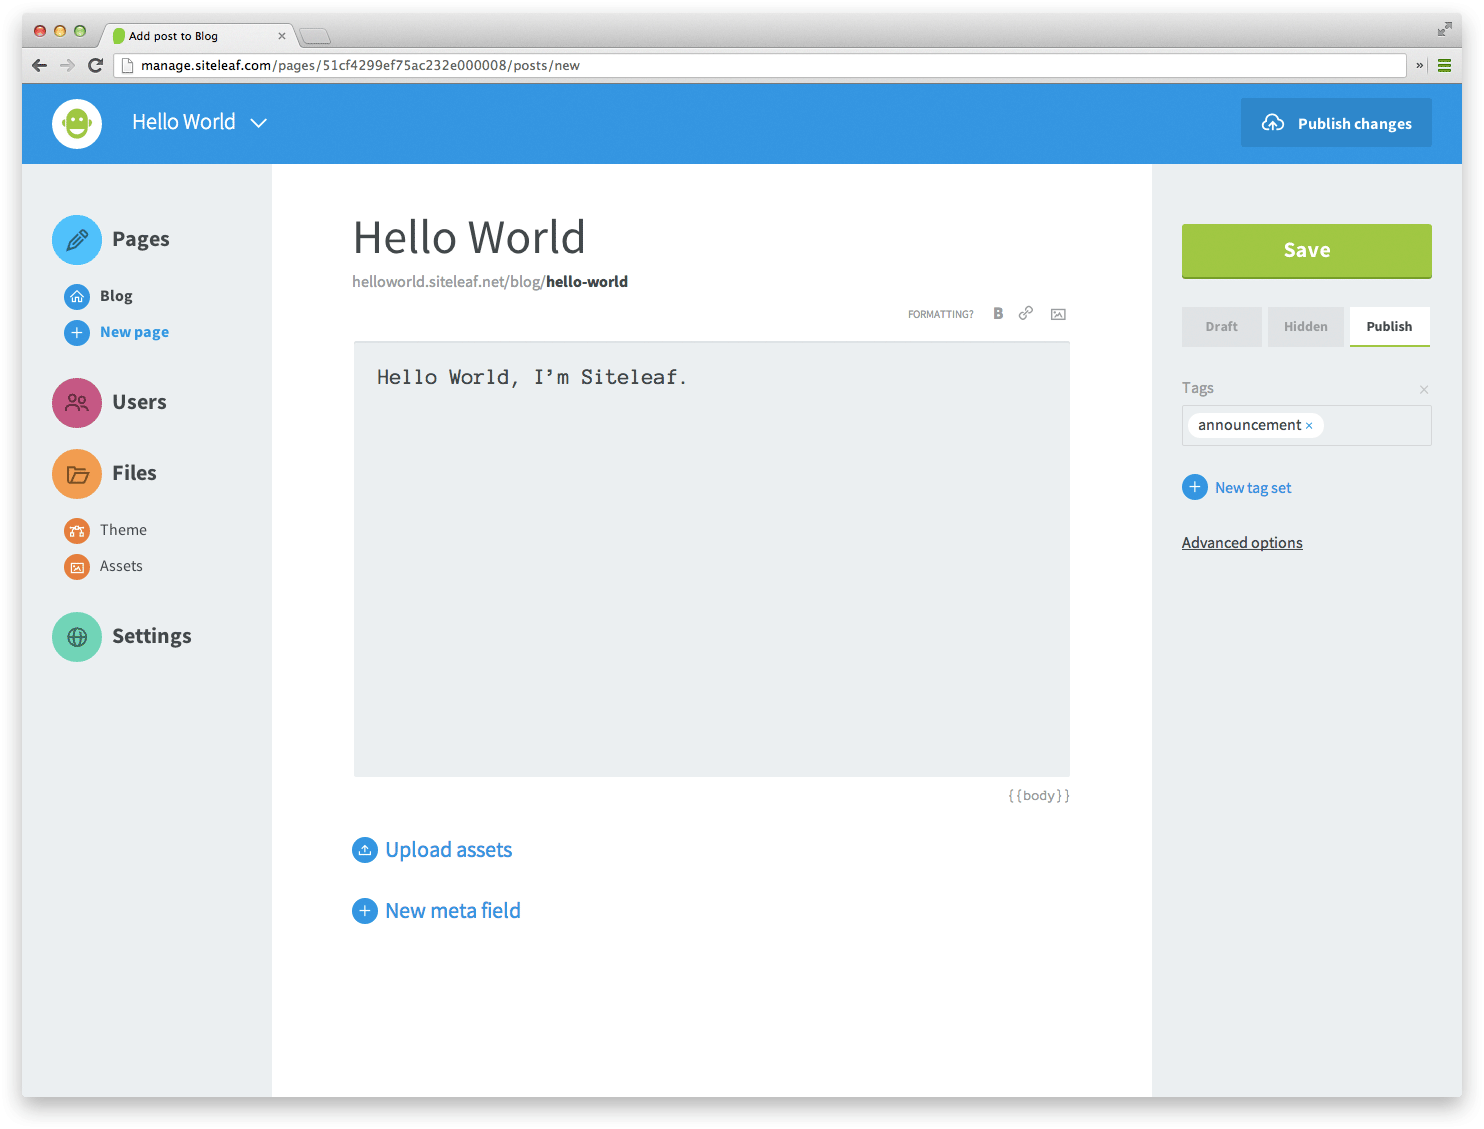
The ‘New post’ view is almost identical to the ‘New page’ view, except for the additional taxonomy option on the right sidebar. I’ll go into great detail about taxonomy in a future post, but for now, you can use it to assign tags to your posts.
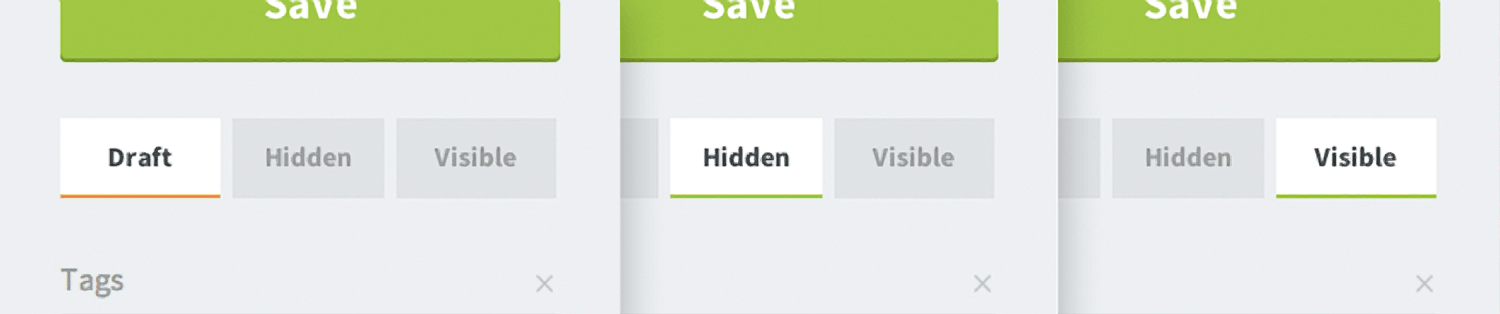
On the right sidebar, we also have visibility options. A ‘draft’ post won’t appear when published. A ‘hidden’ post will only be accessible by knowing its exact URL. And a ‘visible’ post is completely public, included in both the feed and sitemap.
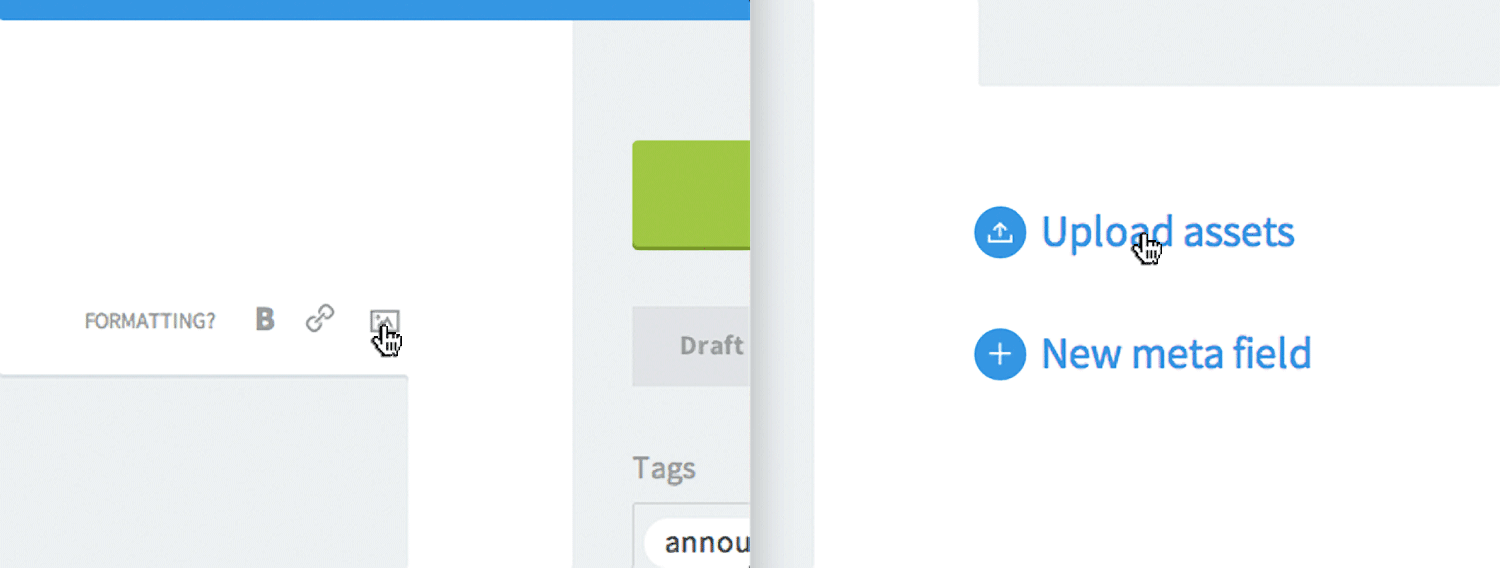
Before we publish, let’s add an image to make our post more visual. We can do this by clicking either the picture icon above the body field or the ‘Upload assets’ link below it. Upon uploading the image, it will appear as a thumbnail below the body. If you used the picture icon, the image’s Markdown code will automatically appear in the body. If you used the ‘Upload assets’ link, you can drag and drop the thumbnail to the body to add the image’s Markdown code.
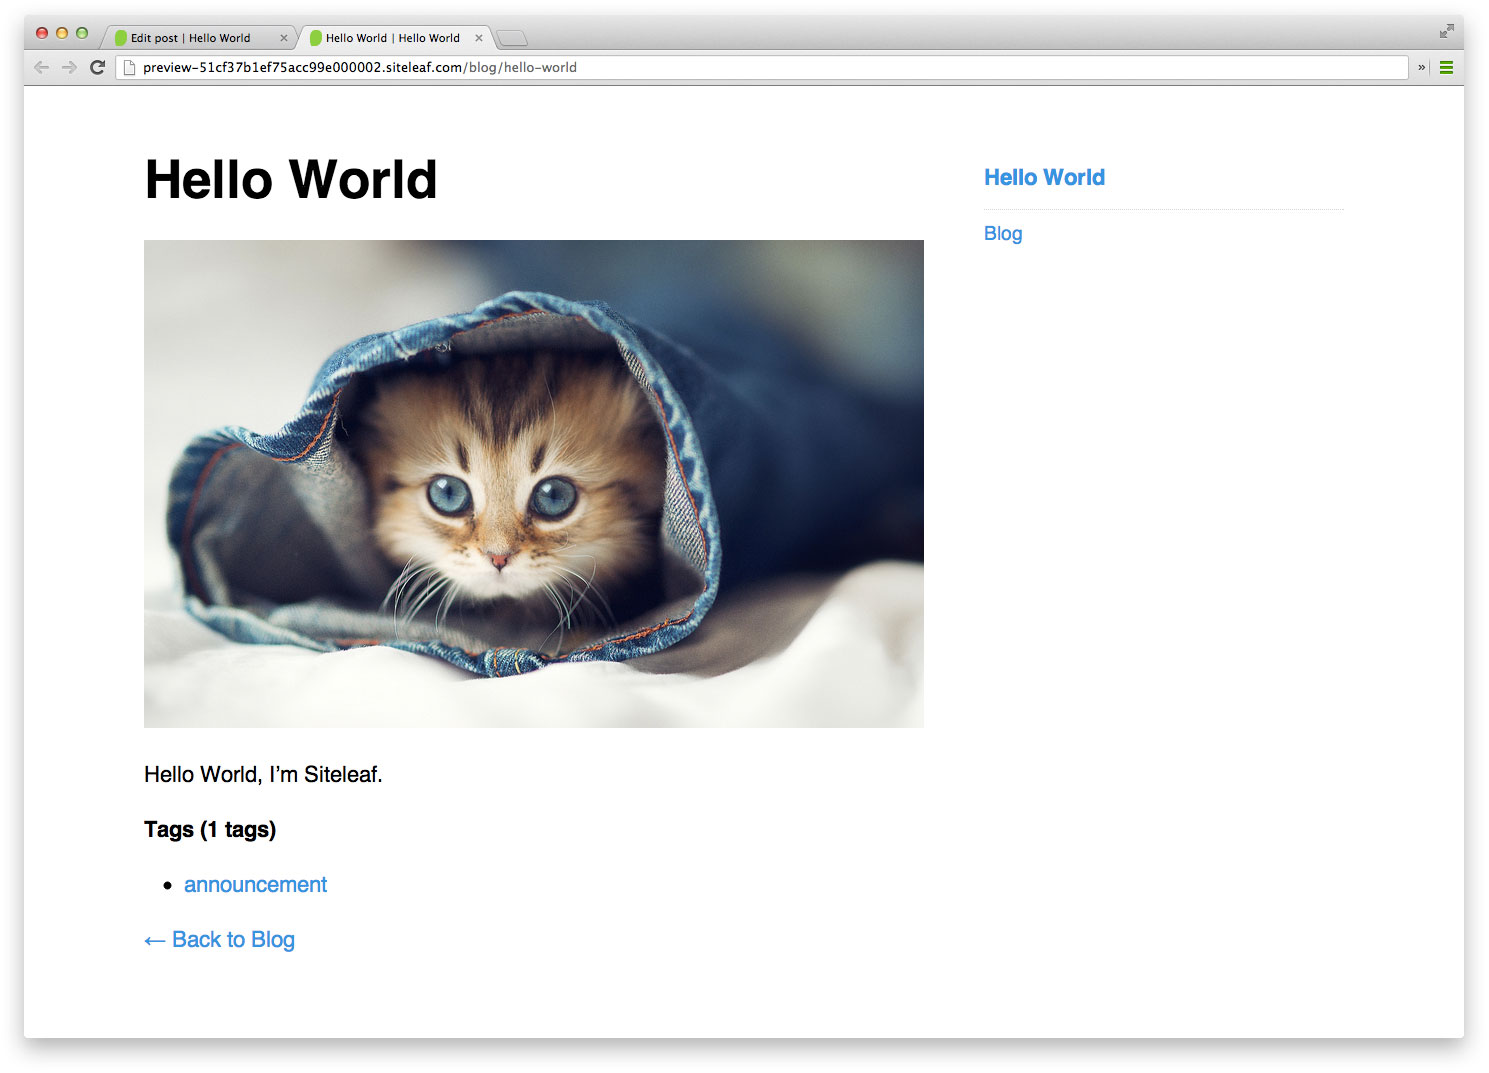
Now, when we preview our post, the image is there along with the ‘announcement’ tag link.
Publishing your site
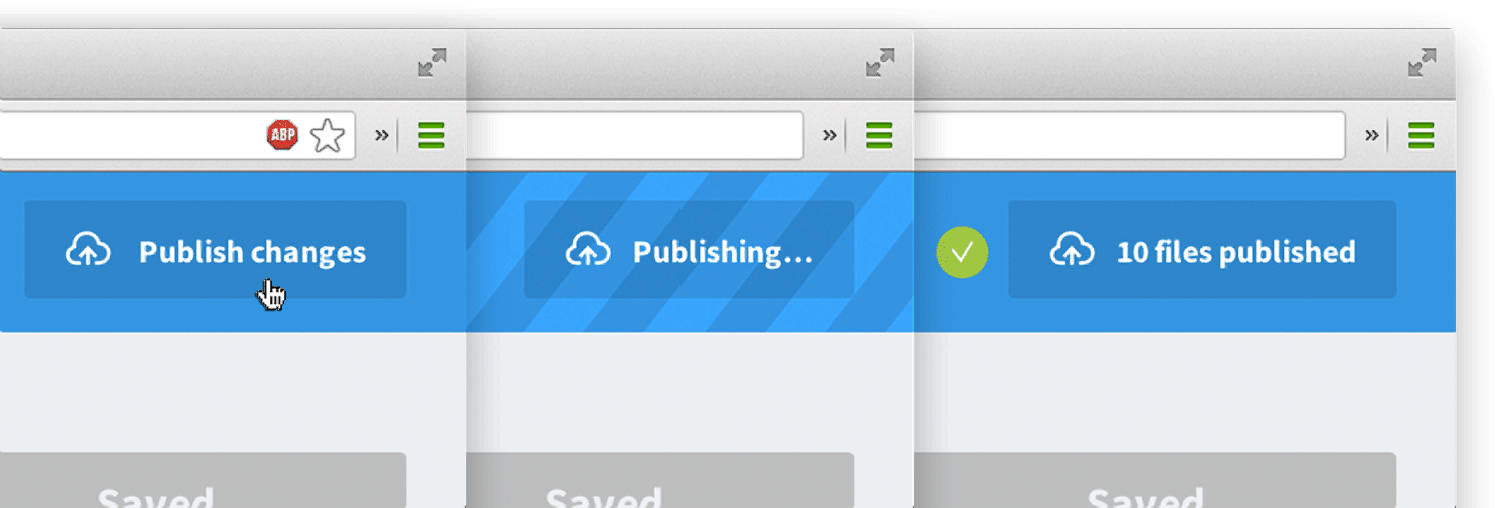
If everything looks good, we can click the publish button on the top right. This will first take your content, combine it with your templates, and compile static HTML files. It will then push the files to your host. With the animation, this moment is actually pretty exciting—it makes any update feel like a big deal, worthy of celebration.
Wrapping up
I covered a lot of ground in this post, but there is so much more ahead of us. While this ‘Hello World’ was a very basic use-case, know that Siteleaf is capable of handling much greater complexity. The next few posts will demonstrate this through use of custom templates, metadata, and taxonomy. In the meantime, feel free to reach out with any questions or comments.