Watch Publishing a new blog post on Vimeo
In this tutorial, we’ll go through how to write and publish a new blog post. To get caught up on Familiarizing yourself with Siteleaf watch our previous video in Siteleaf for Content Managers and Creators.
Writing a new blog post
Head up to the sidebar and click on Posts, located in the content section of the sidebar. When you click on posts, you’ll see something like this.
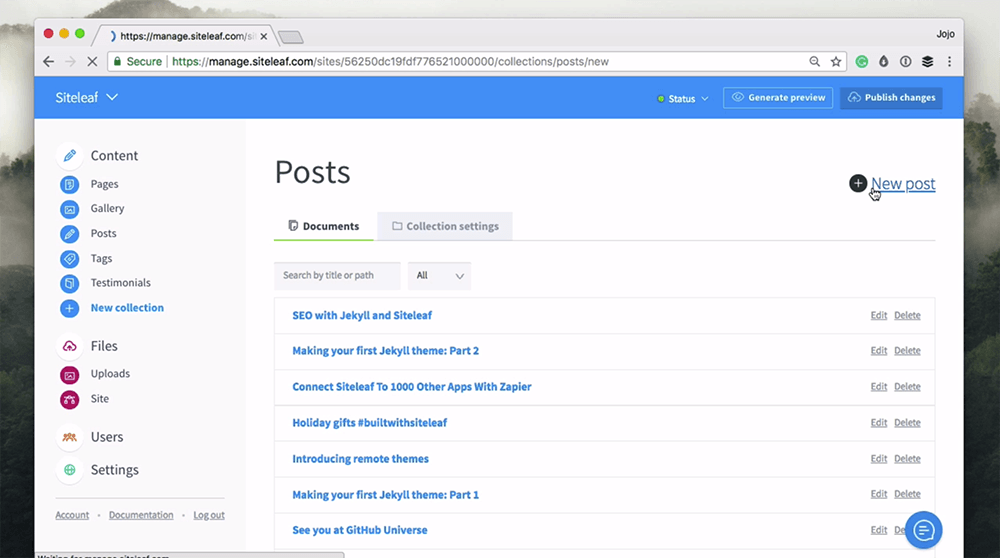
To create a new post press the plus icon on the right side and it’ll take you to a screen that looks like this.
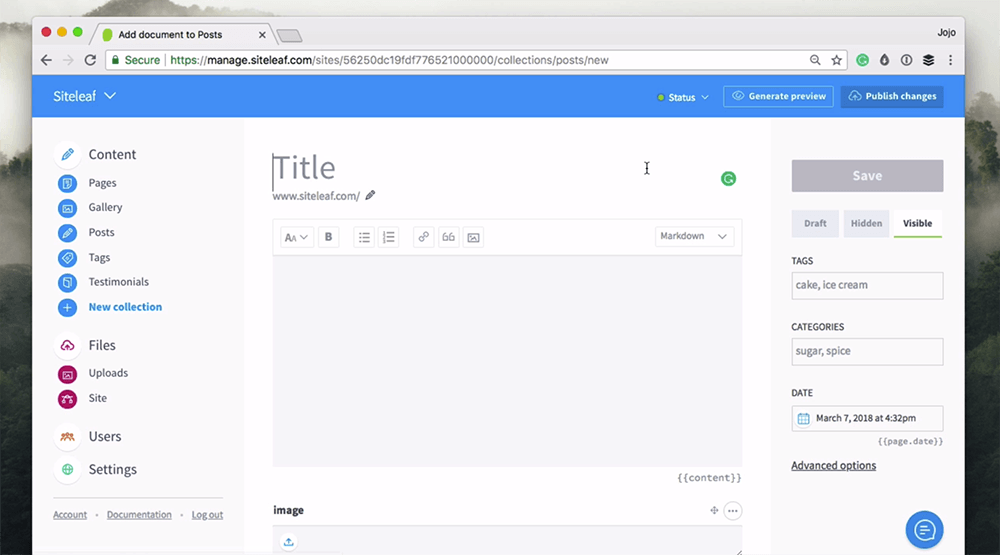
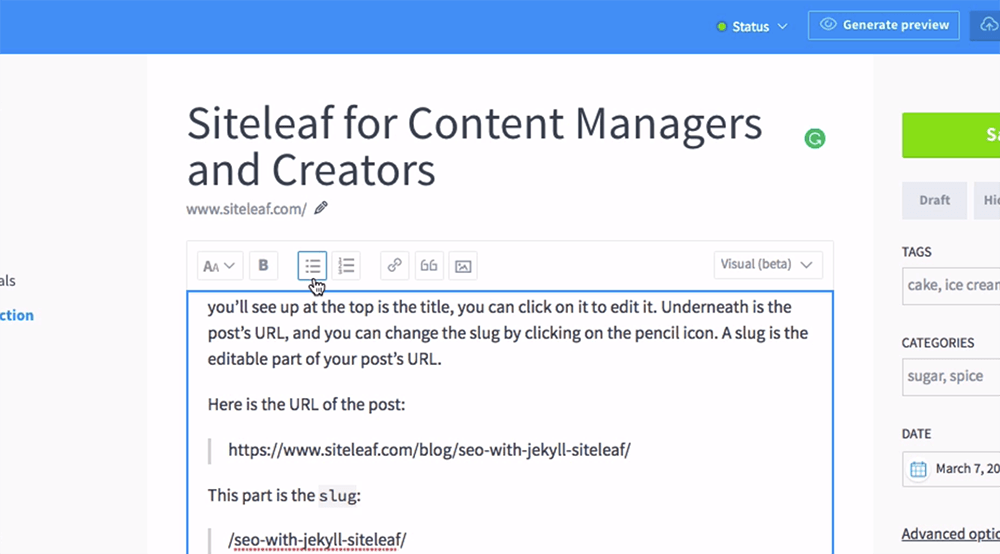
Start by typing your title up at the top.
If you want to specify your URL, you can do that underneath the title, but if you leave it blank Siteleaf will do all the hard work for you and the slug (that’s the end of the URL) will be the title of the blogpost separated by hyphens.
Having slugs that are readable by both humans and machines is good for SEO because it encourages users to click on the link as they already understand the content of the post. It also tells the web crawlers hanging out online what the main subject of the post is about, which will help generate traffic to your site. Read more about SEO with Jekyll and Siteleaf here.
Underneath the URL in the big box is where you write the content for your post.
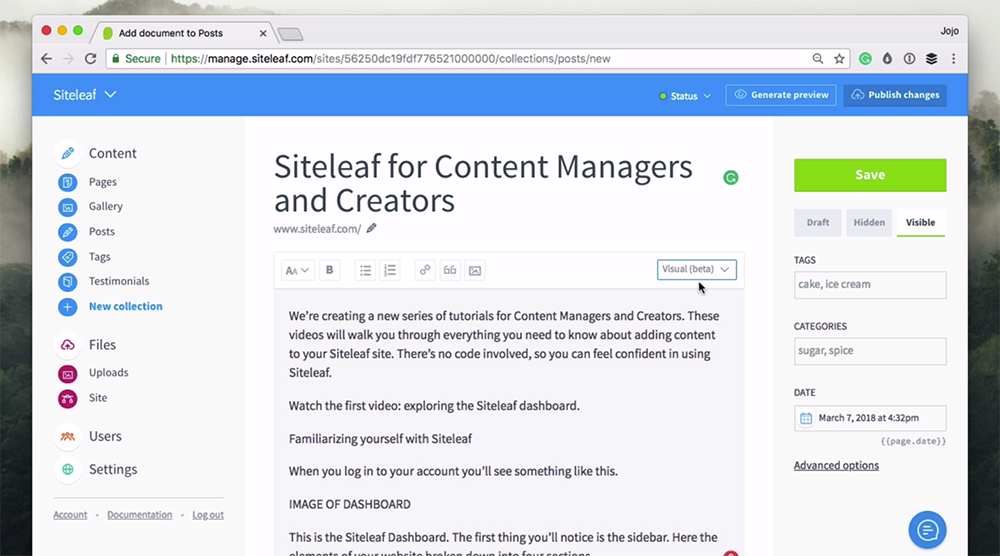
Visual Mode
For the moment we will start in visual mode, and I’ll go into detail later on about Markdown. Visual mode is currently in beta so sometimes it isn’t perfect, but it’s pretty smart and gets there 90% of the time.
If you are used to seeing changes immediately in Microsoft Word and other similar programs this will be helpful for you.
Formatting
The default setting for the text is paragraph, but you can use the toolbar at the top to style the text.
Headings
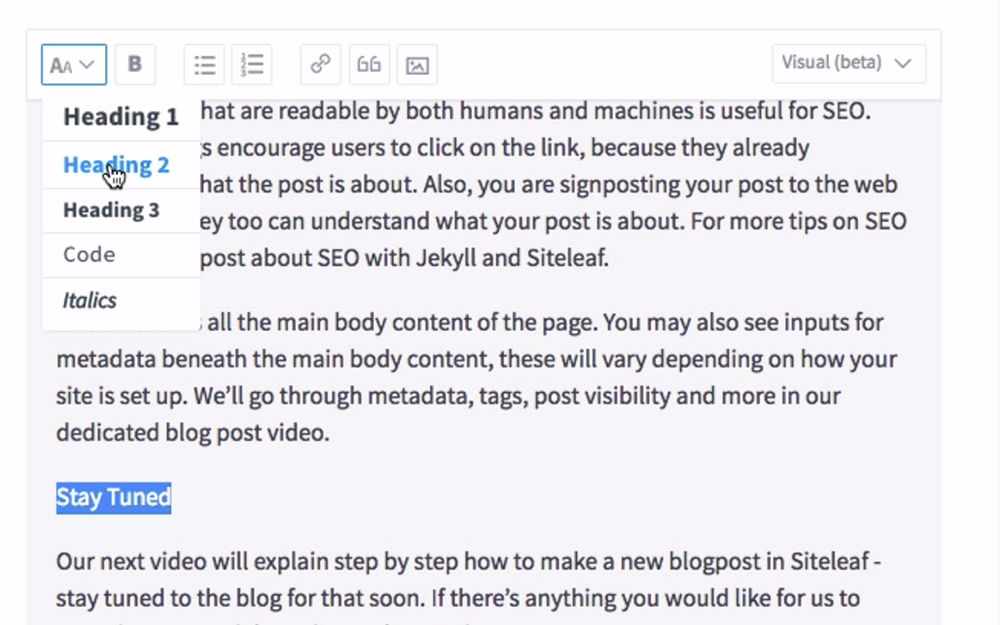
There is a hierarchy of headings built in by your website’s designer. You may want to check with them for usage guidance. But in general, Heading 1 will be the biggest and most eye-catching, Heading 2 will be a bit smaller, a bit less eye-catching and Heading 3 will be smaller still and so on.
To insert a heading, highlight the text that you want to become a heading, then choose from the drop down which type of heading you would like to apply to the text.
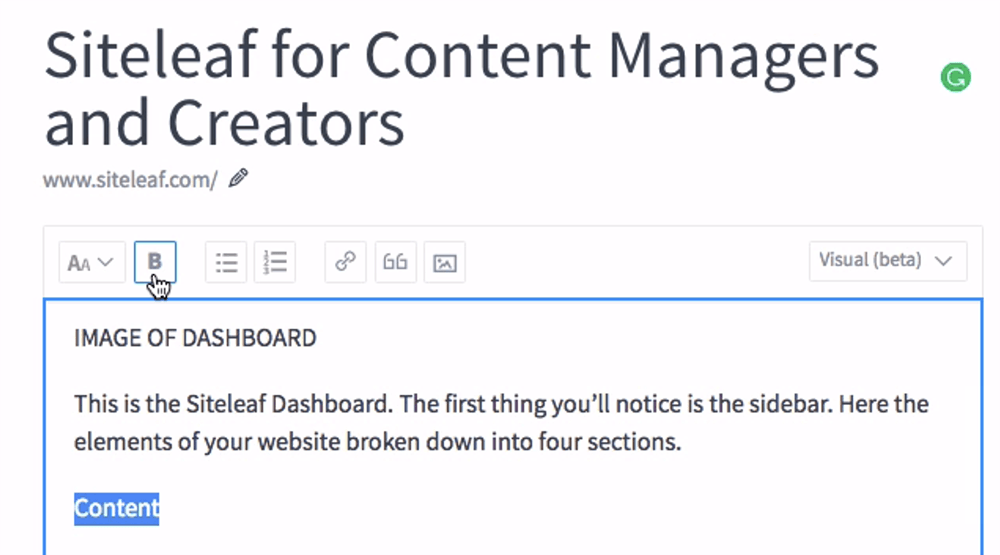
Bold
You can add bold styling do this by highlighting and pressing the bold icon.
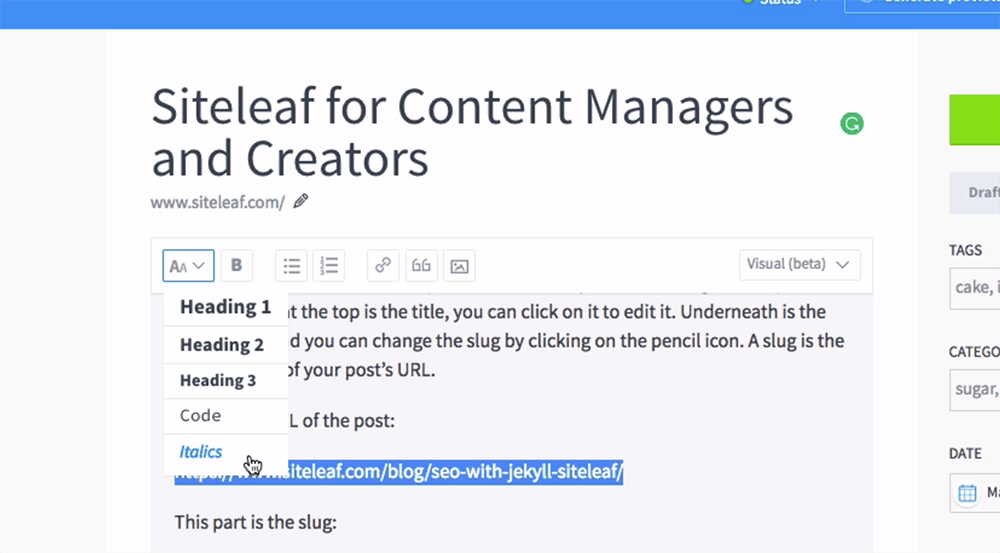
Italics
To use italics highlight the text that you want to make italic, then choose the italic from the drop-down menu.
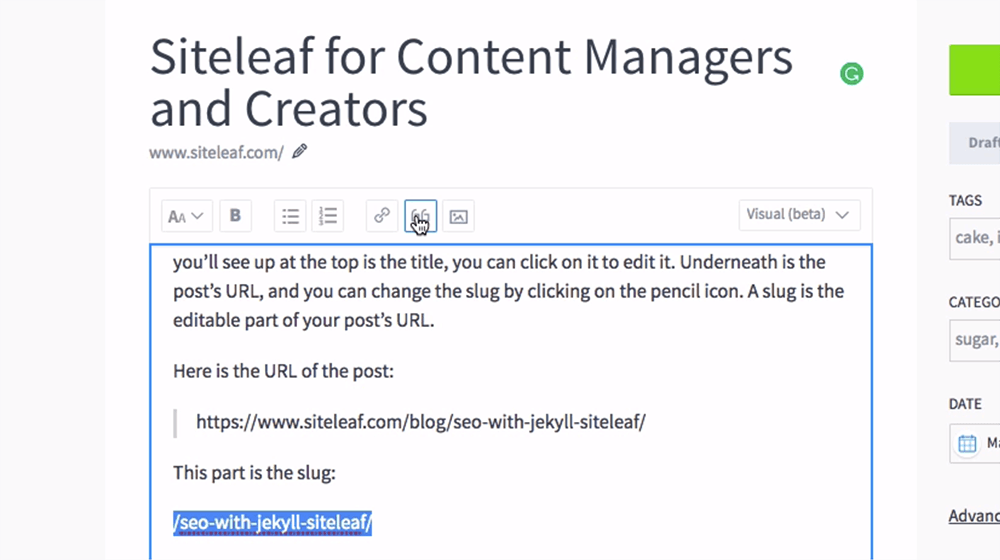
Quotes
You can style a quote by highlighting the quotation and then pressing the quote icon.
Code snippet
If you wanted to share a code snippet; style it by highlighting the text and then choose the code option from the drop-down.
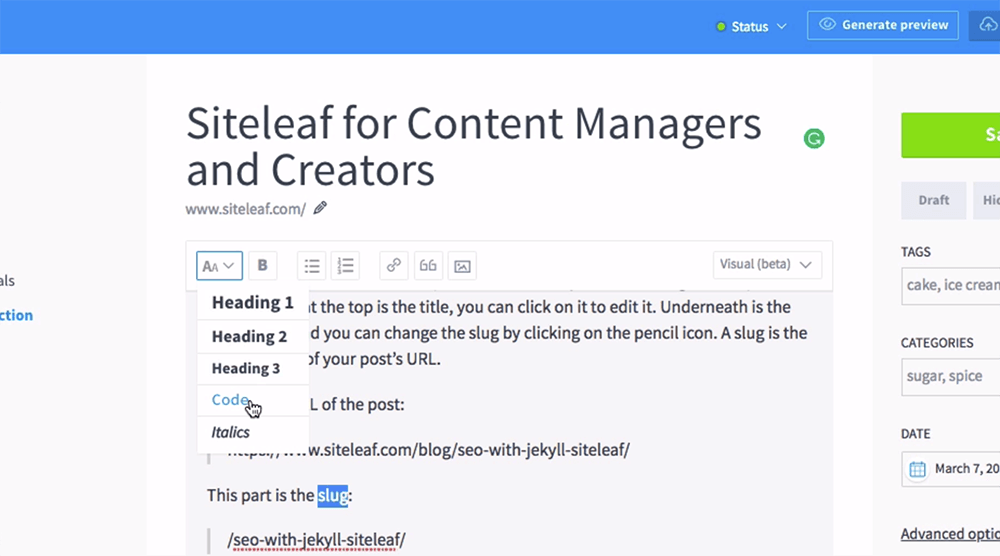
Code snippets can be helpful for technical blogs, and we use it a lot on our blog. But if you’re writing about gardening, you can ignore this option.
Lists
You can make a bullet point (or “unordered”) list by clicking on the bullet list icon, and a numbered (or “ordered”) list by clicking on the numbered list icon next to it.
Adding Hyperlinks
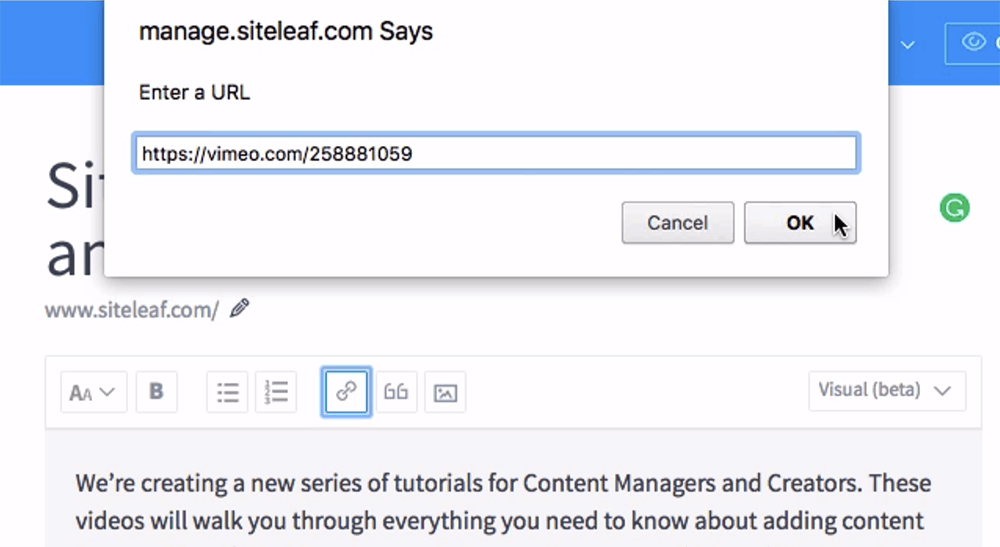
You can add hyperlinks by highlighting the text that you want to become a link then clicking the link button in the toolbar.
Then you’ll see this input where you can add the URL to the website you’d like to direct people to. Once you have pasted that URL in and pressed ‘ok’ the hyperlink will be created.
Adding Images
Finally, you will want to add some images to this post, so it’s not a big wall of text. First tap the image icon and this pop-up will appear.
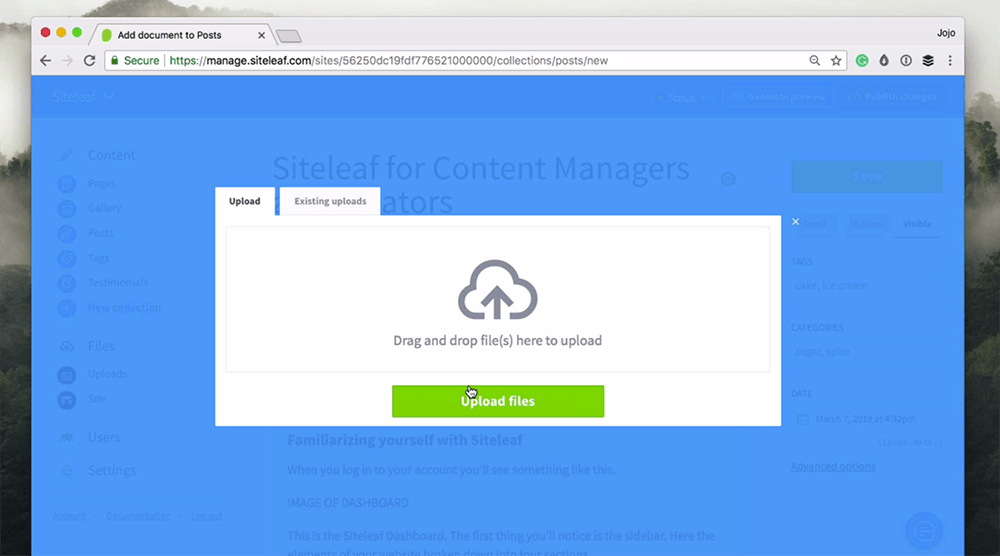
You can drag and drop your images to upload or choose the files from your computer. Also, you can click over to the ‘existing uploads’ tab to discover all the images previously uploaded to Siteleaf.
The first thing you will want to do is place your cursor where you’d like the image to be in your post. Then click on the image button again, and the pop-up will reappear. Then click over to the ‘existing uploads’ tab and select the image you want to input by pressing insert underneath the image. Then you will see the image in the text.
Adding Emojis
Siteleaf will accept emojis in the same way that any other input field would. If you’re on Windows, you can choose the desired emoji from your touch keyboard. Or you can bring up an emoji keyboard on your mac by pressing command, control and the space bar at the same time and clicking on the desired emoji 🚀
Markdown
If you change the view to Markdown from the drop-down in the toolbar, you’ll see that instead of generating a preview of the text styling we saw before there’s a lot of symbols.
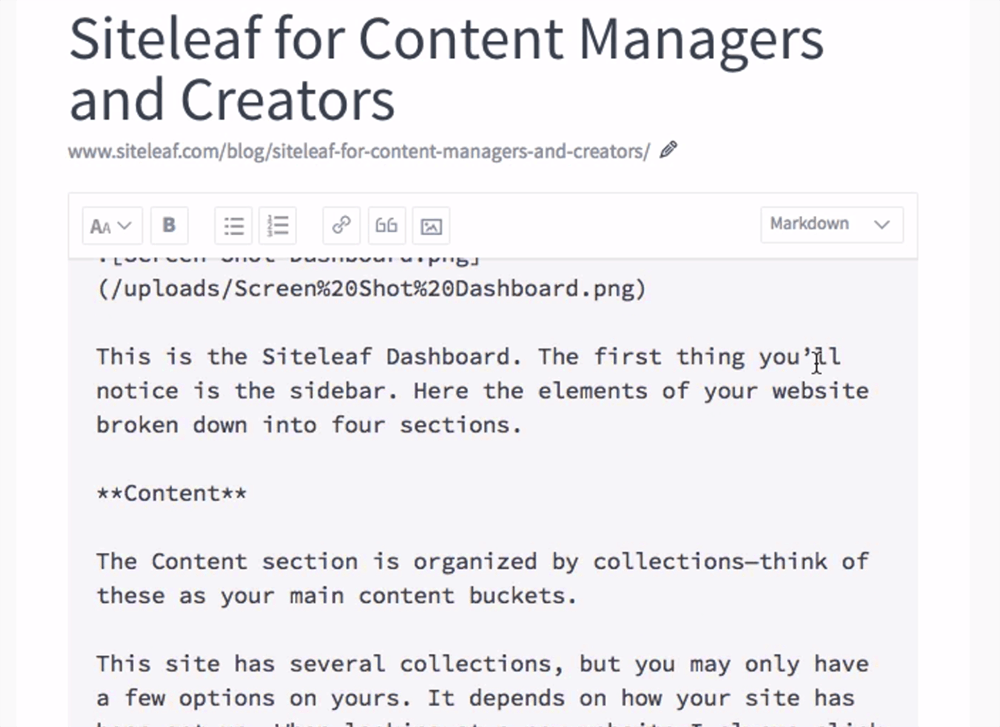
Markdown was created as a simple way for non-programmers to write in an easy-to-read format that could be converted directly into HTML. It uses very simple formatting to accomplish the same thing that HTML or Rich Text Formatting does, but thankfully it’s simpler than HTML because you don’t have to worry about opening and closing tags.
One benefit of Markdown is that the formatting is embedded in the text, so when you copy the text from different programs the styling comes too. There’s nothing more frustrating than formatting something perfectly in a program like Word or Pages, just to lose all the formatting that you’ve added when you copy and paste the text elsewhere.
Another advantage for me is that Markdown uses punctuation and characters that I already know and use. Which means I’m not hunting around on the keyboard to try to remember where an umlaut is.
There are lots of programs out there which help you write in Markdown as it’s such a versatile way of writing, you should check out Bear because it’s bear-y good or iA Writer which also works on Android as well as iOS.
Formatting
Headings
With markdown headings are done with the hash key, or as some of you might know it the pound key.
So, # HEADLINE is a large header. ## HEADLINE would be a header that was a little smaller than the first, and ### HEADLINE would be a smaller header still.
Italics
For italics, you want to put an asterisk or star either side of the word or phrase that you want to become *italic*.
Bold
To make text bold put two asterisks or stars either side of the word or phrase you want to **bold**.
Quote
To turn your quotation into quote formatting put a > greater than symbol at the start of the new line with the quote.
Code snippet
To add a code snippet simply add a ` backtick either side of the text.
Lists
If you want to make a numbered list (also known as an ordered list) simply start a new line and type 1. and then on the next line type 2.
If you’d prefer to make a bullet point list (also known as an unordered list) just pop a dash on a new line each time you want a new bullet point.
Adding Hyperlinks
To add a link surround the word or phase in square brackets and then paste the link in parenthesis after, and boom you have a link.
[text](www.intendedhyperlink.com)
You can still use the link button in the toolbar for any of these functions if it’s easier for you, it isn’t one or the other.
Adding Images
Inserting an image purely in Markdown is a little more tricky. Typically if I’m writing a draft somewhere outside of Siteleaf, I’ll put something like ‘INSERT IMAGE HERE’ in the text and then input the image the same way as described earlier on.
However, it is achievable in Markdown and inserting an image works in the same way as adding a hyperlink. But you have to know the title that the image had when you uploaded it to Siteleaf. To insert an image in Markdown on a new line put:

The location of the image will be along the lines of /uploads/filename
Between the square brackets, you need to add the image’s alt tag. Alt tags are used by screen readers, the browsers used by blind and visually impaired people, to tell them what the image shows. Also, bots use alt tags to understand the image, and this helps your SEO.
There’s more on our blog about SEO with Jekyll and Siteleaf, which you should read for further SEO tips and best practices.
Before you publish
There are a few last steps you’ll want to do before making your post visible, and these will vary depending on how your site is set up.
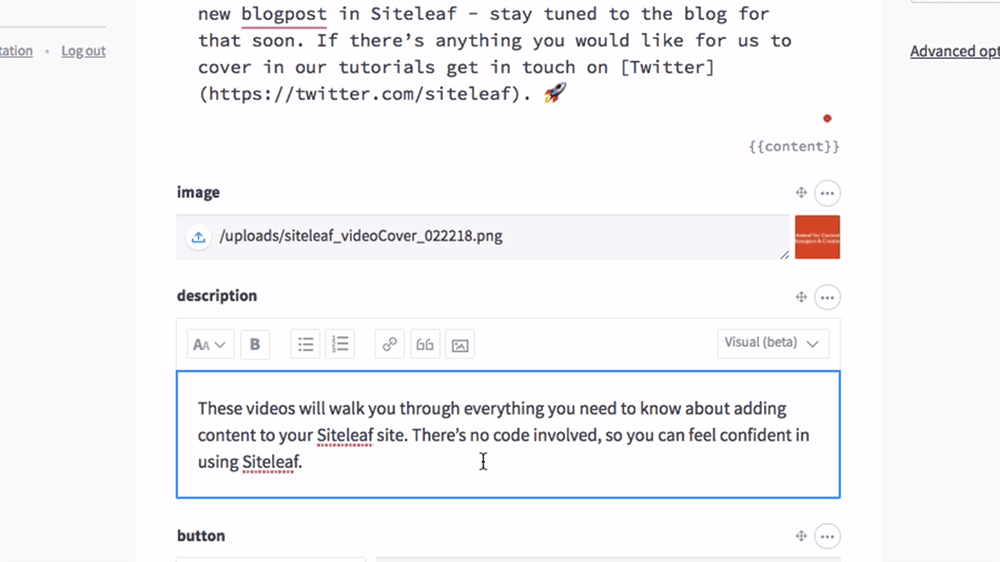
You may find metadata fields beneath the main text input. On our site, there’s a field where you can upload an image that will be displayed when you share the link online, which makes people more inclined to click on the link. Also, there is a field where you can post a description of the blog post. These act like a preview in the same way.
These are called ‘rich previews’ and are particularly useful when posting links on social media like Facebook or in Slack channels as it gives your readers a flavor of what they will see before they click on the link, making them more inclined to click on and read further.
I’d advise speaking to your Admin or Developer about the metadata fields on your site and the best way to use them. You can find more technical information on metadata here.
Flight Panel
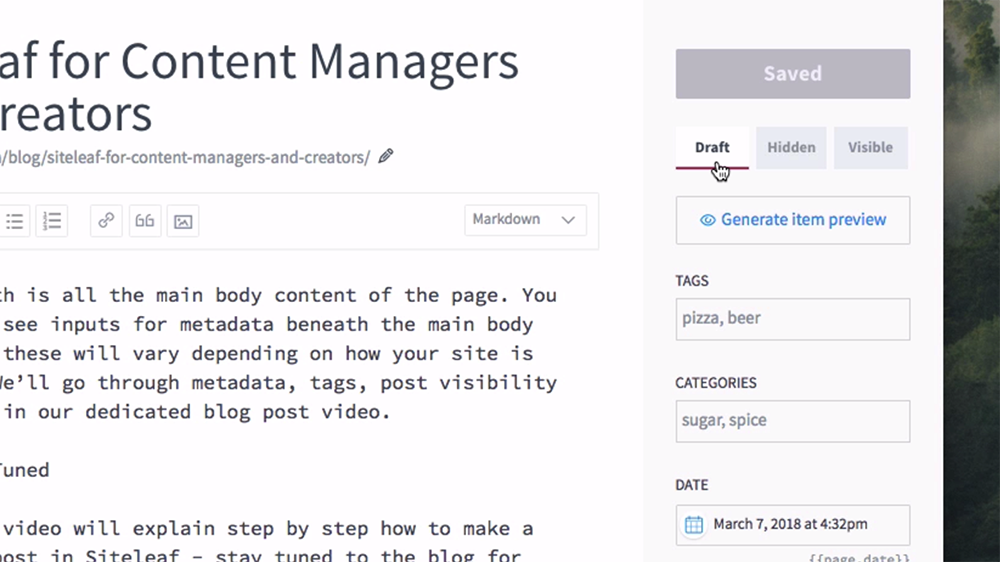
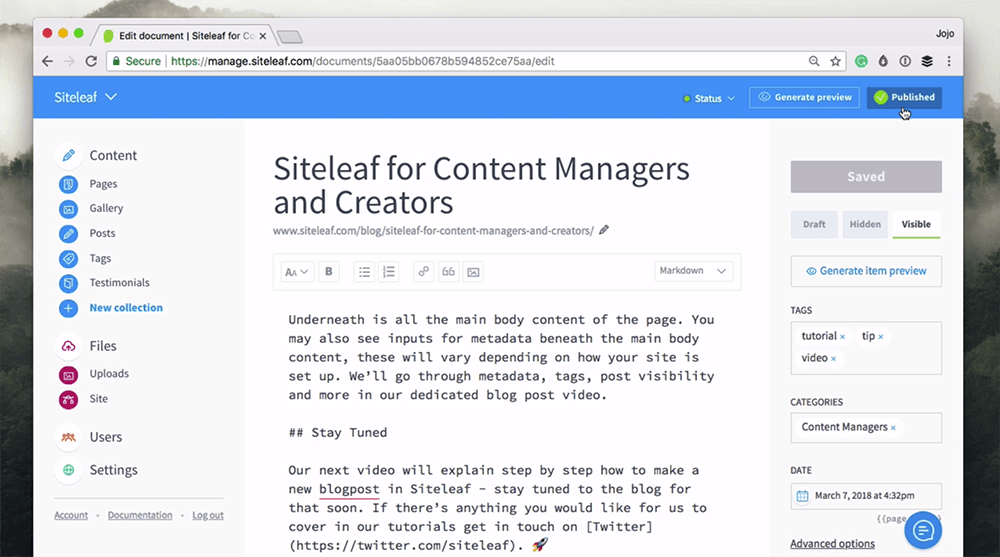
On the right on the main text input, you can see the flight panel.
Save
This button is where you save your changes. Should you forget to save the changes you’ve made and click away from what you’re editing, Siteleaf will prompt you with a pop up to check if you want to leave these unsaved changes.
Underneath there are three options for your post, either ‘Draft’, ‘Hidden’ or ‘Visible’.
Draft
Draft status is for posts that you are currently working on and shouldn’t yet be made public - or if your role is Writer, then this is how all of your posts will be saved before an Admin or Publisher makes them Visible. Learn more about roles on Siteleaf.
Hidden
Hidden posts are exactly that - hidden. These can be useful if you’ve written about your undying love for Chicago style pizza only to discover that you prefer New York style pizza and can’t have your previous opinion all over the internet. As a side note, all pizza is great.
Visible
All the posts that you’ve written that you want the whole world to read should be set to visible.
Tags
We like to use tags on our blog posts so that users can go through the tags to connect with other posts you tagged with the same tag in the past. For example, under the tag ‘pizza’ your readers can click through to see all your past pizza blog posts.
This is great for UX because then someone can press on the tag, like ‘announcements’ or ‘pizza’, and see all the pizza posts on your site. This is also great for SEO. The more thoroughly you use tags, the easier it is for your readers and web crawlers to engage with your content across years of blog posts.
Categories
These are very similar to tags, but with broader groupings. Tags and categories are similar, and their purpose is to sort your content to improve the usability of your site. Meaning when a user comes to your site, they can easily browse through your content by category or by tag rather than browsing chronologically, which is how blogs were initially set up.

These work in much the same way as tags, and you can use them together. For example, you can use the category ‘recipe’ whenever you talk about something you tried to cook, but you can use much more specific tags like ‘pizza’, ‘tacos’, or ‘salad’ too.
You should talk with your developer or site admin to see what is best for your website.
Date
This is the date which the post was published. If you set it to a date in the future, it won’t automatically publish on that date unless you set up a scheduled or automatic publishing schedule.
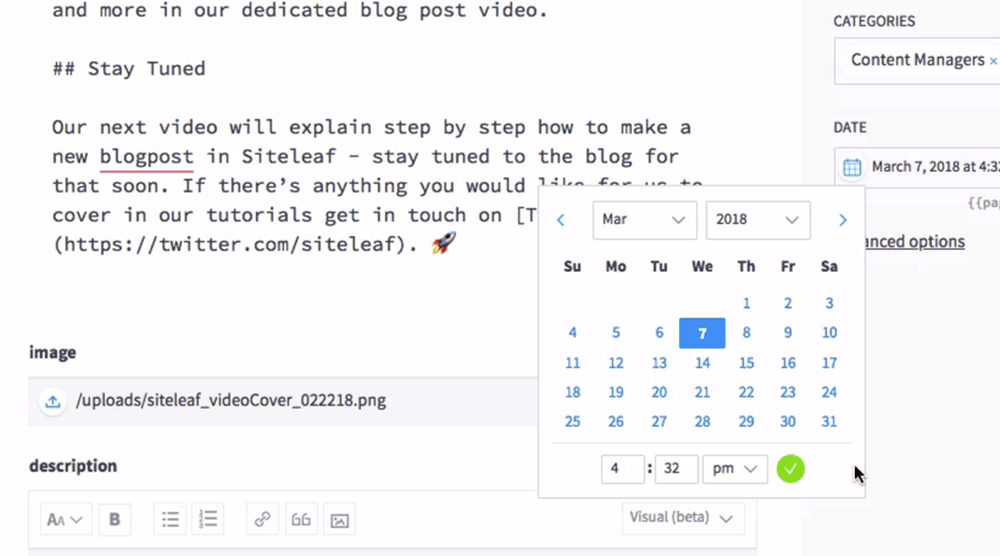
We recommend using Zapier for this task. With Zapier, and you can use it to integrate your Siteleaf site with lots of different applications like Trello, Twitter, Typeform and other apps not beginning with the letter T. Head to Zapier for more information.
Publishing your post
Publish this post by changing the post’s status to ‘visible’ and hit save.
As I mentioned in our last tutorial, I like to generate item preview before I publish a page, just to check that everything looks as I expected and that I haven’t accidentally added the wrong image or misspelled anything.
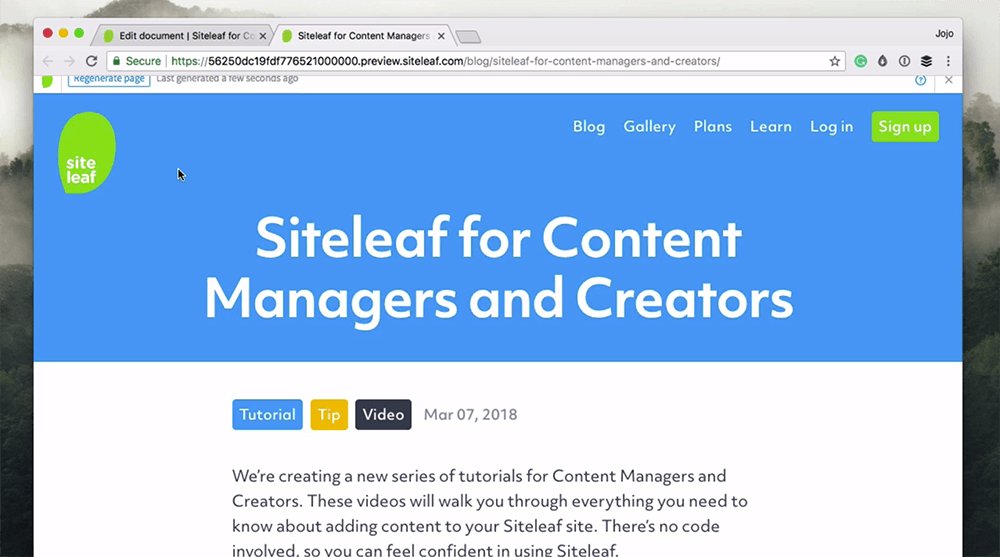
Siteleaf generates a preview in this new tab. Once it’s ready you can check it over. If you’re happy with how it looks head back to Siteleaf’s tab to publish the post. Once you are confident everything looks great you can press ‘publish changes’ in the top right corner.
You will see that a loading animation takes over the blue bar at the top of Siteleaf. Once it’s published you can see the changes that you’ve made on your website.
Sometimes a new post might take a few minutes to show up because your website uses a cache. If this is the case you can access the direct URL and go ahead with sharing the post online.
Stay Tuned
Our next video will explain step by step how to embed videos in Siteleaf - stay tuned to the blog for that soon!
If there’s anything you would like for us to cover in our tutorials please get in touch on Twitter.