Watch Connecting GitHub and Siteleaf on Vimeo
This tutorial will show you how to connect and sync an existing Jekyll site from GitHub to Siteleaf, so you can edit content and preview your site in the cloud.
If you are new to Jekyll, you may want to start with our Jekyll from Scratch first tutorial to catch up on the basics.
What is GitHub sync?
When developing your site, you’ll generally want to keep your theme and content in sync so you can see how everything looks in context.
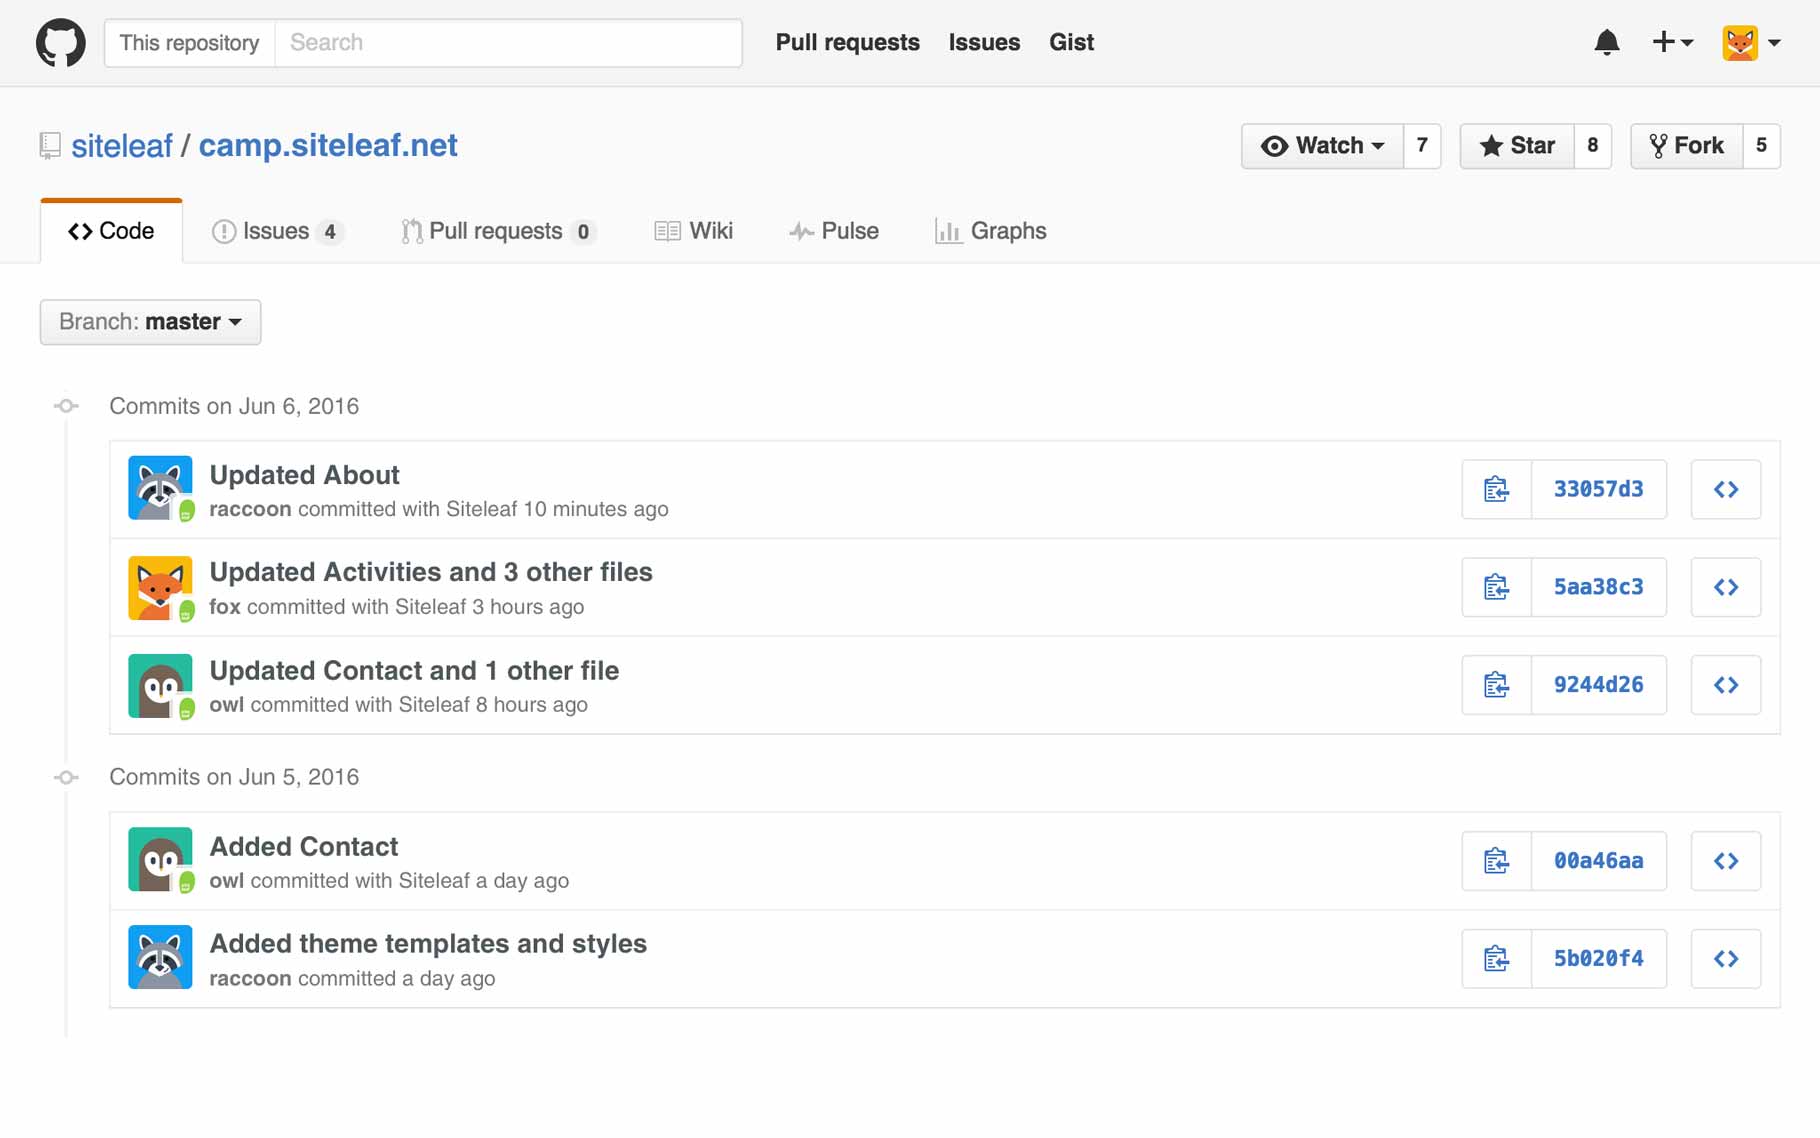
By enabling GitHub sync, any changes you make in your Git repo will be immediately saved to Siteleaf, and vice versa. So any edit you or anyone on your team makes in Siteleaf is synced and backed up. You can see a log of all changes in GitHub, and revert to any state in case anyone makes a mistake.
We like to think of it as a time machine for your content.
Connecting your repo
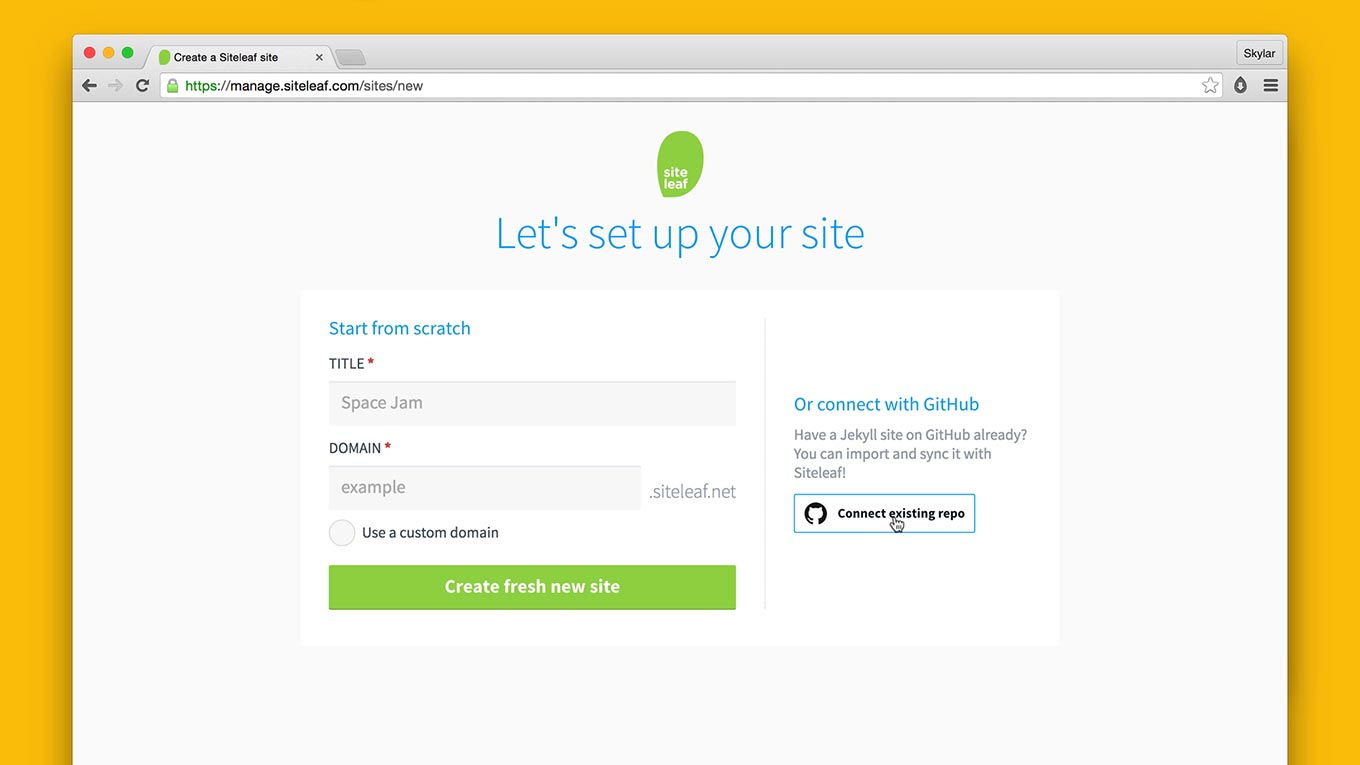
We already have our GitHub repo from the previous tutorial, so the next step is to create a new site in Siteleaf.
-
Log in to manage.siteleaf.com and choose Create new site.
-
Instead of creating your site from scratch (which will give you a default Jekyll theme), choose Connect with GitHub.
-
Siteleaf will give you an option to authorize with Public or Private repo access. Choose the level of privacy that fits your needs.
-
Once authorized, choose your repo name (e.g.
username/my-site). -
Optionally choose a branch name, or leave it blank to accept the default
masterbranch. -
To complete setup, click Connect and create site.
Siteleaf will now go through and import your site’s files. This usually takes a few seconds, depending on the size of your site.
Once completed, you should be redirected to your site’s dashboard in Siteleaf.
Checking status
To confirm the status of your sync, open the Status menu in the top bar. If everything went well, you’ll see a green icon and the time it was last synced.
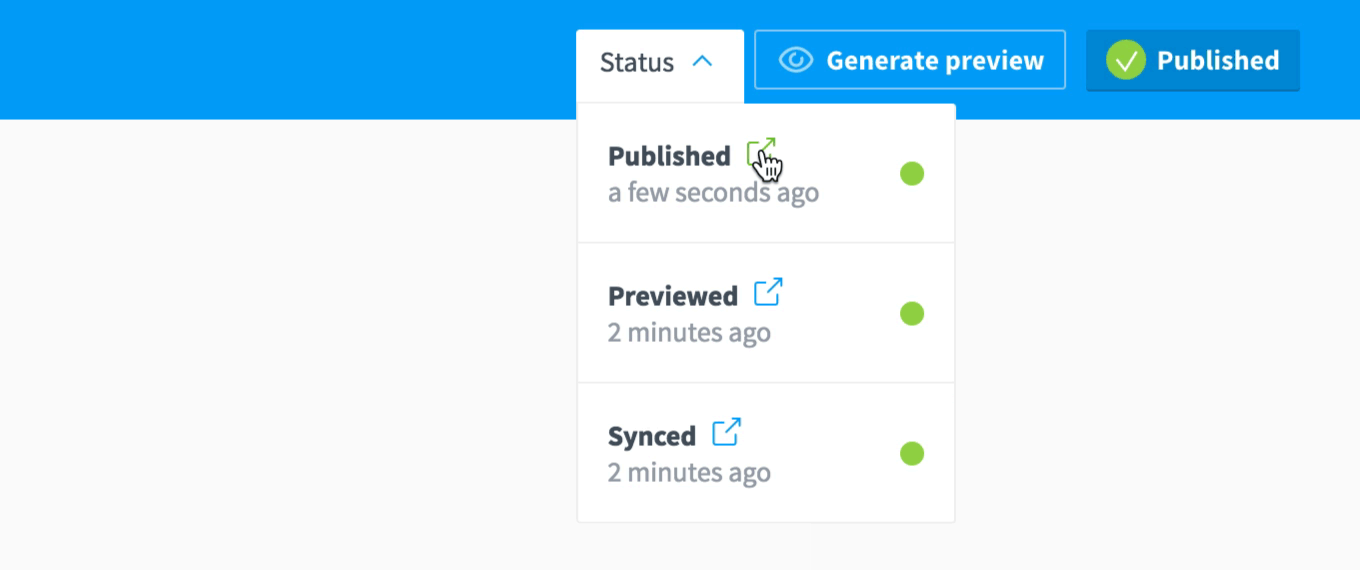
You can also see the status of publishes and previews here, which we’ll get into later. Click the link icons to jump directly to your GitHub repo or preview site.
If for any reason an action wasn’t successful, there would be an red error message here to explain what happened.
On initial sync, you may notice a commit from Siteleaf to normalize YAML front matter. See our Sync FAQ for more.
Jekyll content in Siteleaf
Now that your site is imported into Siteleaf, let’s take a quick look at how Jekyll’s content is organized in the Siteleaf interface.
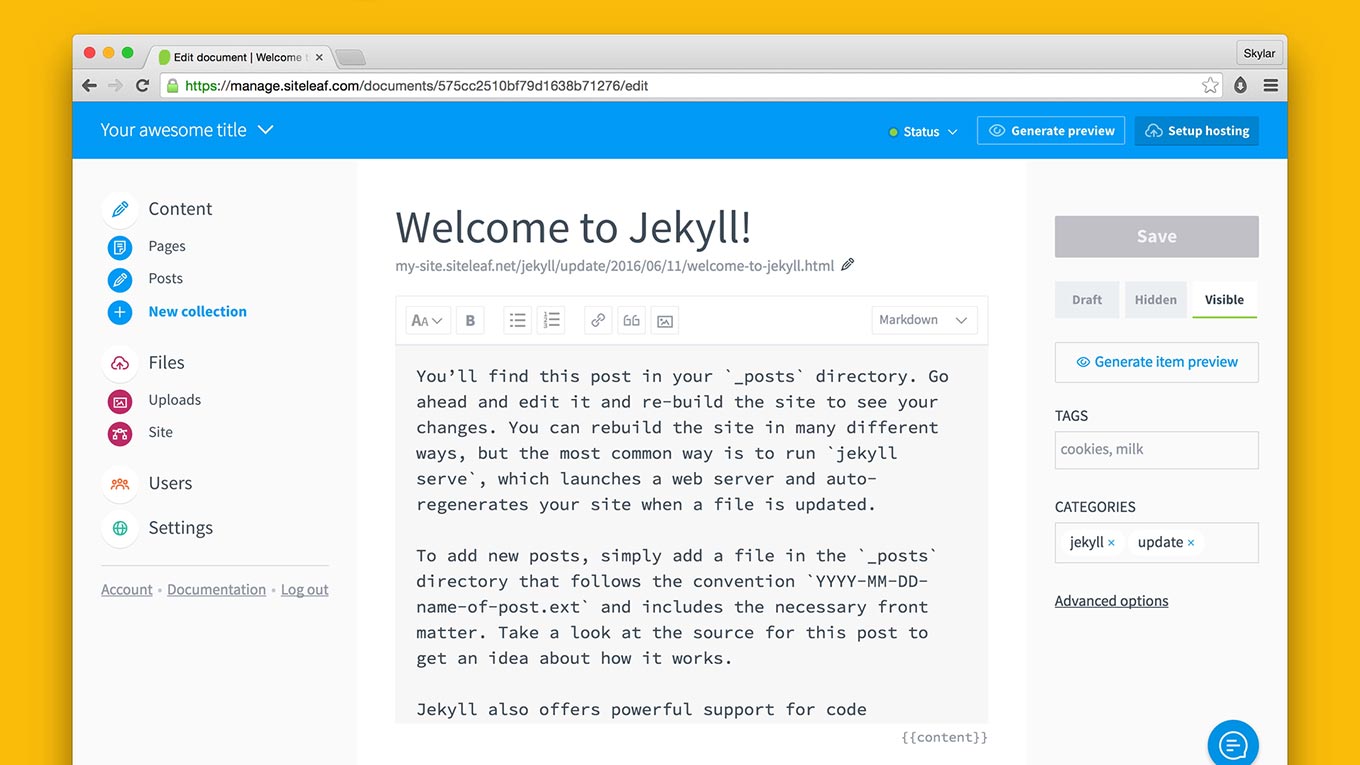
Pages
Any page with a markdown extension (e.g. about.markdown) and front matter will show up here.
Collections
By default, Jekyll sites come with a collection called Posts. This collection will show all markdown files (called Documents) in its related collection folder (e.g. _posts/2016-06-24-welcome.markdown).
You can also create new collections for additional groups of documents right in Siteleaf.
Uploads
Siteleaf has a special collection called Uploads (found under Files > Uploads), which is where we can put images and any non-theme related assets content editors might need to access. In GitHub, this will show up as a directory called _uploads.
Any files uploaded using the admin interface will automatically be placed here.
Site files
You can see a full file tree of everything under Files > Site. Unlike Pages and Collections which only surface Markdown files, this shows everything from content to theme (similar to what you see in GitHub).
Settings
Lastly, you’ll see an option for Settings. This allows us to modify the same settings and metadata from Jekyll’s _config.yml file, as well as set up hosting and change our sync settings.
Creating a new page
Now lets try adding a new page, by choosing Pages > New page. As a shortcut, you can also click the + icon next to Pages in the left menu.
Feel free to give your page a name (I’m going to call mine “Contact”), add some text, and save.
You’ll notice Siteleaf syncs this change in the background, and you can jump back to the GitHub repo to see how this change looks.
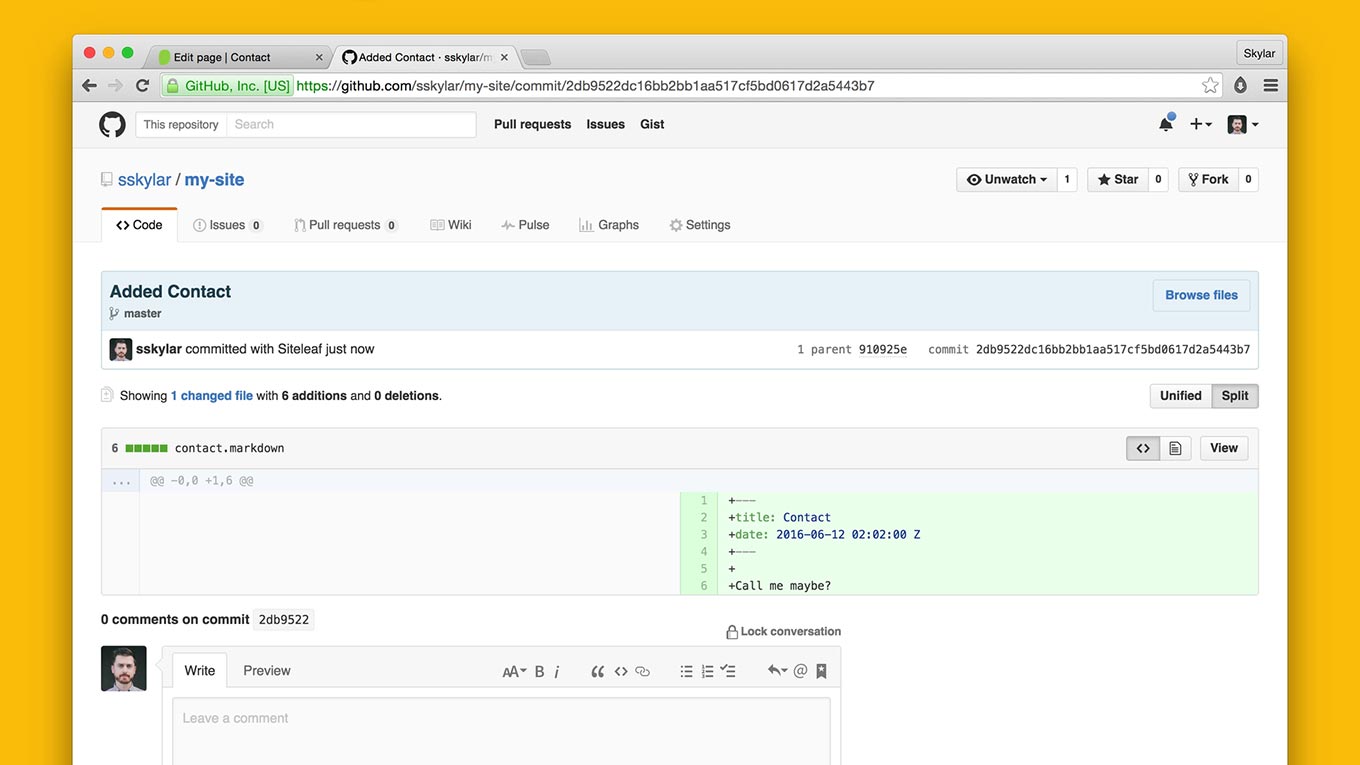
You should notice a new markdown file (in my case called contact.markdown) which contains the title and body that we created.
Previewing your site
Siteleaf lets you build and preview your site in the cloud. This is a great way to see how your content looks and catch any mistakes before publishing changes live.
To have a quick look at our new page, click Generate item preview located under the save button.
This will open a unique URL where you can preview your entire site. This URL can be also be shared with clients or colleagues to quickly show development progress or get feedback on unpublished content.
When previewing your site, Siteleaf will automatically include future-dated and draft posts. These generally will not be published live, unless enabled in your site configuration.
Publishing your site
Siteleaf allows you publish just about anywhere: GitHub Pages, Amazon S3, Rackspace Cloud Files, and FTP or SFTP servers (like MediaTemple, Dreamhost, Digital Ocean, and so on).
For this demo I’ll choose GitHub Pages, which we love. It’s backed by a CDN and included free with your GitHub account.
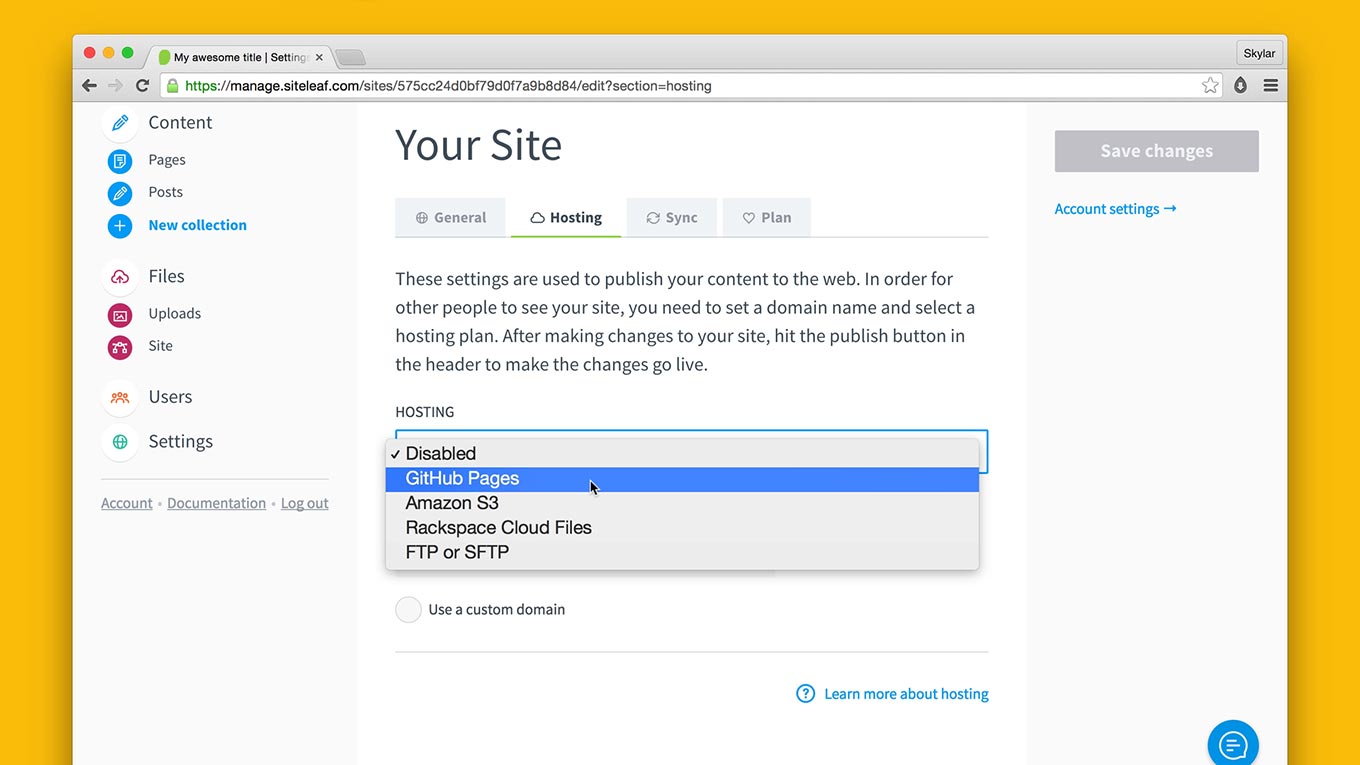
To configure hosting with GitHub Pages:
-
Click Settings from the left menu and jump to the Hosting tab.
-
You can use a custom domain if you want, or stick to a free
siteleaf.netsubdomain to get started. Siteleaf will automatically create GitHub’s requiredCNAMEfile to make this work. -
Next, choose Connect with GitHub again, and choose the permission we want.
-
Enter your repo name (e.g.
username/my-site). Normally you’ll want to choose the same repo that you’re syncing with, but you can publish to a different repo if you prefer. -
Optionally specify a branch name, or leave it blank to use the default
gh-pagesbranch (which GitHub uses for Project Pages). -
Finally, you can choose to have the site compiled by Siteleaf or GitHub Pages (the default). Both of these options will give you essentially the same final website. But if you choose Siteleaf, it will precompile your site to HTML and let you know if there are any issues before pushing it to your repo.
-
To complete setup, click Save.
The instructions above will be similar for other hosting providers, see our help docs for specifics.
Now to publish the site, hit Publish changes in the top bar.
Siteleaf will publish your site in the background and let you know when its finished. Depending on the size of your site, this may take a several seconds (longer if Siteleaf is precompiling the site for you).
Once its done, visit your domain name and check out your new site! As a shortcut, you can jump to your live site from within the status menu.
Next steps
To dive deeper, check out our help site learn.siteleaf.com.
Stay tuned for an upcoming tutorial where we’ll further explore Siteleaf and how to customize the admin for your site.