Tutorial

Publishing a new blog post

Watch Publishing a new blog post on Vimeo

In this tutorial, we’ll go through how to write and publish a new blog post. To get caught up on Familiarizing yourself with Siteleaf watch our previous video in Siteleaf for Content Managers and Creators.

Writing a new blog post

Head up to the sidebar and click on Posts, located in the content section of the sidebar. When you click on posts, you’ll see something like this.

1-screen-shot-of-posts-small.png

To create a new post press the plus icon on the right side and it’ll take you to a screen that looks like this.

Read more

Siteleaf for Content Managers and Creators

Watch Siteleaf for Content Managers and Creators on Vimeo

Our new series of tutorials will walk you through everything you need to know about adding content to your Siteleaf site. There’s no code involved, so you can feel confident using Siteleaf.

Familiarizing yourself with Siteleaf

When you log in to your account you’ll see something like this.

Screen Shot Dashboard.png

This is the Siteleaf Dashboard. The first thing you’ll notice is the sidebar. Here are the elements of your website broken down into four sections.

Content

This section is organized by collections — think of these as your main content buckets.

This site has several collections, but you may only have a few options on yours. It depends on how your site has been set up.

When looking at a new website I always click on each collection to familiarise myself with the content and then look at the published website to see how they relate.

Pages

A page is the most basic content type in Siteleaf - these might include your ‘about’ page, or a ‘contact’ page. See more about how to edit existing pages here.

Posts

As a content creator, you’re most likely to want to know about the blog. Posts are connected to the blog page on your website.

Screen Shot Posts.png

If your site does not have a blog, then feel free to ignore this section. You can click on the title of the post to edit.

Read more

Making your first Jekyll theme: Part 2

This is a guest post by David Darnes, creator of the Alembic theme.

In Part 1, I gave an overview of creating themes for Jekyll and a few tips for when you’re developing your own theme. In this second part, I’m going to give a full step-by-step guide to developing your own Jekyll theme gem.

Getting Setup

Before we get stuck in, you’re going to need a couple of things. It’s good to have at least a basic understanding of Jekyll; the file structure is very similar to making a Jekyll site, as is the development process. Unsurprisingly, you’ll actually need Jekyll as well, which can be installed using Ruby. For Mac users, this will be quite straightforward, as Ruby comes preinstalled. This means you can just use the following command in your command line tool of choice:

$ gem install jekyll

You can use the following article if you’re trying to install Jekyll on a Windows machine.

If you’re planning for your user base to use Siteleaf or GitHub Pages, you can install the official GitHub pages-gem, but make a note of the specific gems you’re using, as you’re going to need them later in the development process. You should also install Bundler, which will help you to manage all the gems you are using in your gem theme.

Finally, create an account on RubyGems.org - you’ll need this account later on when you want to submit your theme gem so others can install it easily.

Read more

Making your first Jekyll theme: Part 1

This is a guest post by David Darnes, creator of the Alembic theme.

By nature, any well structured site that has easily editable content is ‘themeable’ — a layer, or skin, that presents content in the way the owner or creator intended; Jekyll is no different. Pages, posts and any other form of formatted content can be segregated from the templating files.

Themes for Jekyll have been around for a while, but the process of installing a theme was a bit clunky. Content files and templating files would have to be carefully copied over. But, with the introduction of Gem-based themes, themes can now be installed with a couple of lines of code.

Read more

JAMstack e-commerce with Siteleaf & Snipcart

This is a guest post by Charles Ouellet, co-founder of Snipcart.

If you’re reading this blog, you know static web development is trendy, to say the least. Unless you just got out of a years-long meditation retreat in a cave with no Internet. If that’s your case, well, hum, welcome back!

At Snipcart, our developer-first shopping cart platform, we’ve been diving into static site generators and related tools for 2+ years now. And we believe they are the next big thing.

A short while ago, a friend of ours gave an in-depth conference on why “static” is a bad word for the modern front-end stack, aka the JAMstack (JavaScript, APIs, & Markup).

And he’s right:

Static definition

There’s nothing “undesirable” or “uninteresting” about the modern static websites & apps developers are pushing online. It’s in fact quite the opposite.

As a community, we need to give this new paradigm a name worthy of its actual value, and that’s exactly what the JAMstack is.

But this post isn’t a philosophical essay on the benefits of the API economy and the modular development approach. It’s about putting together a killer e-commerce workflow that ticks all of the boxes on the JAMstack checklist:

  • Entire site on a CDN
  • Atomic deploys
  • Instant cache invalidation
  • Everything lives in Git
  • Automated builds

So today, I’m going to show you how to build an API-centric, fast and secure e-commerce project in 5 simple steps. And I’m going to use the right JAMstack tools to do so.

Let’s do it!

Read more

Creating tag pages with Jekyll and Siteleaf

In this tutorial, we show you approaches for creating tag pages in Jekyll and Siteleaf.

This is part two of a tutorial series on Jekyll and Siteleaf. Check out part one on author pages.

The plugin approach

If you plan to use more than a dozen or so tags, a plugin can save you from having to create individual documents for each. This approach lets authors and content managers easily create new tags on the fly, while having autocomplete available in the Siteleaf UI.

Read more

Creating author pages with Jekyll and Siteleaf

At Oak, we recently launched a new website for our friends at Collaborative Fund, built on Siteleaf. The site features a blog for their prolific content, including author and tag pages.

In this tutorial, we show you how to set up your Jekyll blog with author pages and leverage Siteleaf to maintain your content.

The approach we use in this tutorial can be easily adapted to other sets of content as well, not just authors. It also is plugin-less, which means it can be readily published to GitHub Pages on Siteleaf’s free Developer plan.

Read more

Customizing the Siteleaf admin

Watch Customizing the Siteleaf admin on Vimeo

Siteleaf v2 was built to be customized. In this tutorial, we’ll dive deeper into the Siteleaf admin and learn some tricks on how to tweak the interface to suit our needs. We’ll cover collections, permalinks, metadata, smart fields, defaults, and user roles.

If you followed the previous tutorials, you should now have a basic understanding of Jekyll and the Siteleaf admin. Feel free to check those out first if you haven’t.

Watch the video above, or follow along with the text version below.

Collections

By default, you should have 2 content areas: Pages and Posts.

Pages is your home for standalone content like your about page, contact, FAQ, and so on. Pages can be drag and drop ordered, and nested using the move icon next to each page.

Posts is a default Jekyll collection that’s blog-aware, so each piece of content here (called documents) is stamped with a date, and generally shown in date-descending order.

The Posts collection also comes with some special features: drafts, tags, and categories.

If these features are useful to you, but the name “Posts” isn’t quite doing it for you, you’re welcome to rename this collection under Collection settings. For example, I might want to call mine “Stories” instead.

Read more

Image and video processing for your static site

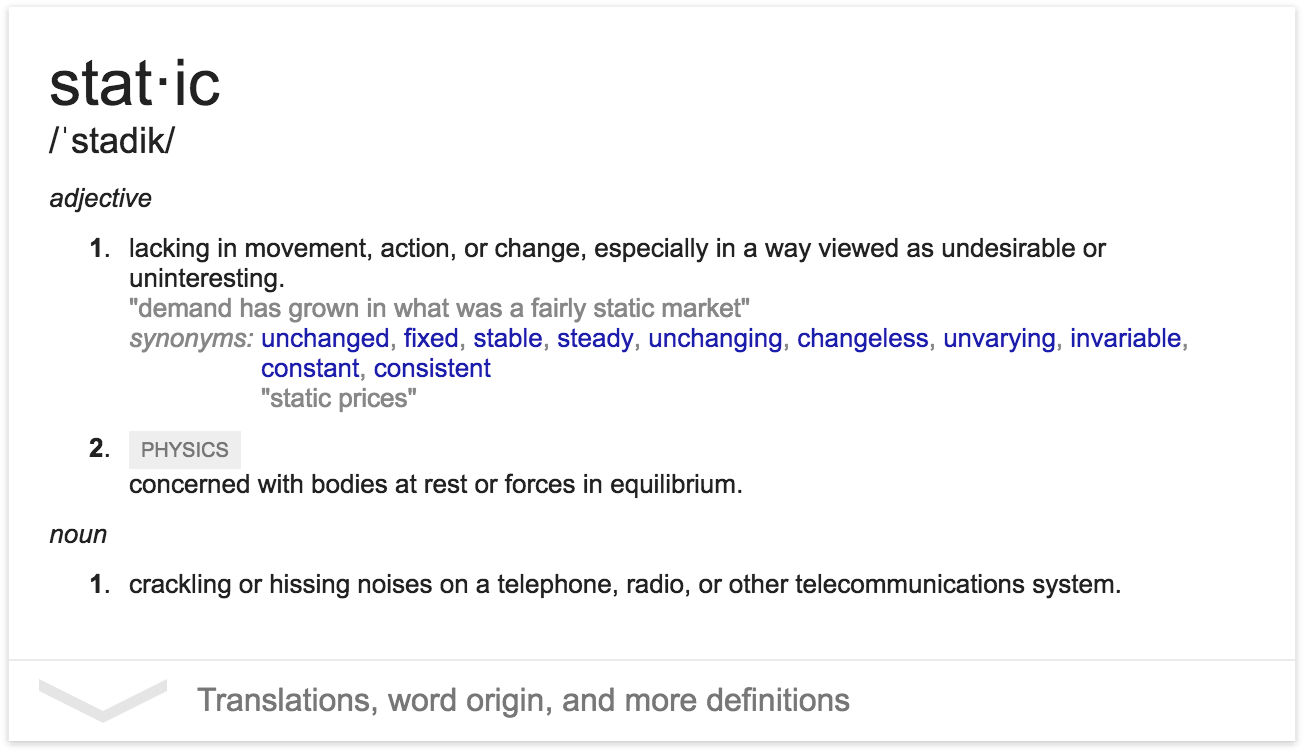
Static HTML sites are great — there’s no reliance on a server or database, you can host them for cheap, archive an entire copy on a USB drive, and when they’re properly optimized they can be blazing fast. Optimization can be tricky when it comes to static sites though. Since there’s no server processing and generating your pages, you don’t have the benefit of using something like ImageMagick alongside a gem like CarrierWave, which makes it easy to resize and optimize your images when they’re uploaded. The same goes for video. If you’re not hosting your video on YouTube or Vimeo, you’re responsible for transcoding the video into the various formats favored by the different browsers. So what’s a developer to do?

Processing as a service

One option is to use a 3rd party. There’s been a handful of companies who have started offering image and video processing as a service. These services are a great option if you don’t want to maintain your own solution, are “on demand”, and make it really simple to get started. To name just a few:

imgix servers

imgix generates your images on demand. In your image URLs you specify parameters like the dimensions, filters, face detection and type of cropping. Once the image is generated, it’s cached and served via their CDN. imgix charges $3 per “1,000 master images accessed each month” and $0.08 per GB of bandwidth.

Cloudinary offers processing services for images and video and is a bit more robust than imgix. Cloudinary offers a limited free plan with the next step up being $44/month.

Embedly, like Cloudinary, offers processing options for both images and video. They offer a limited free plan with the next step up being $23/month for video and $9/month for images.

Filestack is another. In addition to processing images and video, they offer document transformations and URL screenshots. They offer a limited free plan with the next step up being $49/month.

Rolling your own solution with AWS

What if you don’t want to pay a premium to subscribe to another service to process and serve your media? Typically you don’t need all the whiz-bang options offered by 3rd party services and a straightforward approach is typically enough for simple sites. Static sites can benefit just as much from a microservices approach as any other type of site, and if you host your site on S3, AWS gives us all the tools we need to processes our own images and video for much cheaper, though with a bit more setup and expertise required from our end.

Read more

Connecting GitHub and Siteleaf

Watch Connecting GitHub and Siteleaf on Vimeo

This tutorial will show you how to connect and sync an existing Jekyll site from GitHub to Siteleaf, so you can edit content and preview your site in the cloud.

If you are new to Jekyll, you may want to start with our Jekyll from Scratch first tutorial to catch up on the basics.

What is GitHub sync?

When developing your site, you’ll generally want to keep your theme and content in sync so you can see how everything looks in context.

By enabling GitHub sync, any changes you make in your Git repo will be immediately saved to Siteleaf, and vice versa. So any edit you or anyone on your team makes in Siteleaf is synced and backed up. You can see a log of all changes in GitHub, and revert to any state in case anyone makes a mistake.

We like to think of it as a time machine for your content.

Read more

Jekyll from scratch

Watch Jekyll from Scratch on Vimeo

This tutorial was created using Jekyll version 3.1.6. Newer versions (3.2+) will give you a theme by default instead of _layouts and _includes. For the purpose of this tutorial you may want to downgrade to Jekyll 3.1.6 (to remove other versions, run gem uninstall jekyll). Stay tuned for a future tutorial on themes!

In this tutorial, we’ll show you how to get set up and develop websites locally using Jekyll. We’ll cover installation, creating a new site, file structure, and finally we’ll commit the new site to GitHub.

This will give you a functional website that you can edit offline. Also make sure to check out the next tutorial where we’ll connect our site to the new Siteleaf v2 so we can edit content in the cloud.

What is Jekyll?

Jekyll is a static website generator built on Ruby. It takes Markdown text (your site’s content) and Liquid templates (your site’s theme) and outputs simple HTML that can be hosted pretty much anywhere.

It’s also what powers GitHub Pages, which serves more than half a million websites.

Getting started

To get started, we are going to install Jekyll, which is available to download as a Ruby gem. We’ll be following the quick-start instructions on Jekyll’s website.

So let’s open the trusty command line.

First, you’ll want to make sure you are running a recent version of Ruby. You can confirm by running the following command:

$ ruby -v

The latest stable version is 2.3.1, but anything above 2.2 should be fine. If you need to upgrade, we recommend using something like rbenv to make it easy.

Read more

Publishing via the API

This post refers to a legacy version of Siteleaf.

For the last week publishing in the Siteleaf interface has been powered by our API. This has been a requested feature by some of our users and ourselves. Its behavior is bit different than some of our other API endpoints, so let’s go over it.

To initiate a publish, make an authenticated POST request to the /sites/:id/publish endpoint.

$ curl -u "$API_KEY:$API_SECRET" -X POST \
  https://api.siteleaf.com/v1/sites/$SITE_ID/publish

{"job_id":"e79af12c79ccd8866902d3dd"} 

This triggers a publish and immediately returns a job ID (or returns an already running job ID if one exists). You can stop here if you’d like and Siteleaf will happily chug away in the background.

But the fun doesn’t stop there. You can optionally check in on publish progress using your job_id from above by making an authenticated GET request to the new /jobs/:id endpoint.

Read more

Advanced Liquid: Group By

This post refers to a legacy version of Siteleaf.

Advanced Liquid: Group By

Following sort and where, this Advanced Liquid post introduces another handy new filter to Siteleaf: group_by.

As the name suggests, this filter allows you to group your content by a certain property.

For example, here’s how we could group all posts by year published:

{% assign posts_by_year = site.posts | group_by:"year" %}

You can group by any property like date, title, slug, even metadata and taxonomy. Here are a few real-world examples you may want to apply to your theme.

Read more

Advanced Liquid: Where

This post refers to a legacy version of Siteleaf.

Advanced Liquid: Where

Now that you are sorting like a pro, we’ll move on to another new and exciting Liquid filter: where.

Where allows us to find content based on a parameter. If you are coming from Jekyll, you’ll be happy to know it follows the same syntax.

For example, here’s how we could find all pages titled “Foo”:

{% assign foo_pages = site.pages | where:"title","Foo" %}

As with sort, you can use any property like date, title, slug, even metadata and taxonomy. Below are few real-world examples you might find useful.

Read more

Advanced Liquid: Sort

This post refers to a legacy version of Siteleaf.

Advanced Liquid: Sort

Liquid is the flexible templating language that powers themes on Siteleaf. While simple at first glance, there’s a lot of power under the hood for those wanting a greater level of control. In this new blog series, we’ll dive deeper and take a look at some advanced Liquid code and examples.

First up in this post, we’ll take a look at the sort filter.

With any site, Siteleaf makes some general assumptions about your content. For example, posts are sorted by date (newest post shows first) and pages are sorted manually. In cases where this doesn’t fit your design, you can utilize the sort filter to order content any way you wish.

For example, here’s how we might sort pages by date:

{% assign sorted = pages | sort:"date" %}

This will sort in ascending order, but we could also choose descending order by adding reverse:

{% assign sorted = pages | sort:"date" | reverse %}

You can sort on any property like date, title, slug, even metadata and taxonomy. Below are few real-world examples you might find useful.

Read more

Using AWS S3 and Route 53

After building Siteleaf we took it upon ourselves to each rebuild our site using the service. I had previously used S3 with Jeykll and wanted to continue using it, but getting set up can be a bit of a mystery.

I’m assuming that you’re using Route 53 for DNS, and want to serve content from the root domain while having www redirect to it.

Amazon S3

Head to your S3 Console where you’ll make one bucket named after your root domain, and another with the www subdomain (e.g. example.com and www.example.com). Take note of the region you choose.

s3-1

Read more

Layouts in Siteleaf

This post refers to a legacy version of Siteleaf.

Layouts in Siteleaf

In my last article about Siteleaf, I wrote about what goes into porting a theme to Siteleaf from another CMS. This time around, I’ll show you how to write cleaner, less redundant templates through the use of layouts.

Read more

Porting a theme to Siteleaf

This post refers to a legacy version of Siteleaf.

Porting a theme to Siteleaf

Today, I ported another theme to SiteleafAllison House’s Martin theme. I started porting themes to Siteleaf earlier this month as a self-imposed challenge. A friend of mine asked if a particular theme was possible to implement using Siteleaf and rather than answer with a simple ‘yes’, I responded with the ported theme. This was a great way of demonstrating Siteleaf’s adaptability, but also a useful exercise for myself to see where Siteleaf excels and where it falls short. In this post, I’ll walk through porting the Martin theme and show you just how easy it can be.

Read more

Markdown in Siteleaf

This post refers to a legacy version of Siteleaf.

Markdown in Siteleaf

In the last Siteleaf post, we explored taxonomy and the many ways you could use it to extend your website. This time, we’ll break from templating and take a closer look at content—specifically, Markdown’s role in Siteleaf.

Markdown

If you develop for the web and haven’t heard of Markdown yet, I’m going to have to ask you to leave. As described by its originator, John Gruber, “Markdown is a text-to-HTML conversion tool for web writers.” With it, we can write a blog post, like this one, and style it without touching HTML. Instead of typing <strong>bold</strong> for a selection of text we’d like to bold, we can type **bold** and use a Markdown engine to produce the proper HTML syntax. This allows for more legible text when writing, so we don’t lose track of the actual words.

Along with styling, we can also use Markdown for more complex elements, like links: [alt text](http://mylink.com), and images: ![alt text](/myimage.jpg). Under the hood, Siteleaf uses Redcarpet, a widely-adopted Markdown engine, and SmartyPants, a plugin for automatic smart quotes and other fancy characters. With these libraries, we get a few extra shortcuts for free, like em dashes: ---, ellipsis: ..., and tables:

| First name | Last name   | Age |
| ---------- | ----------- | --- |
| Jonnie     | Hallman     | 26  |
| Larry      | Fox         | 15  |
| Sawyer     | Hollenshead | 14  |

With the support of Markdown, Siteleaf posts can follow our guiding principle—all content should outlive its CMS. No matter where you manage your website, you should be able to take your content with you, free from any ties to the previous system.

Read more

Taxonomy in Siteleaf

This post refers to a legacy version of Siteleaf.

Taxonomy in Siteleaf

Last week, I wrote about metadata in Siteleaf and the variety of ways you could use it to customize your website. In this post, I’ll do the same, but with metadata’s much cooler, older brother—taxonomy.

Read more

Developing v1 sites and themes

This post refers to a legacy version of Siteleaf.

Watch Developing v1 sites and themes on Vimeo

In this video, we show you how to create Siteleaf themes using Liquid and develop sites locally using the Siteleaf Ruby Gem and Pow/Anvil.

Watch this tutorial on Vimeo.

Also see: Getting started with Siteleaf

Metadata in Siteleaf

This post refers to a legacy version of Siteleaf.

Metadata in Siteleaf

In Siteleaf, metadata is pure key/value data attached to a site, page, or post. It provides a way to interact with templates beyond the basic usage of injecting title or body copy. Metadata can be used to set inline CSS values or specify the number of posts on a given page—the uses are endless. It’s also very flexible, down to a per-entity level. A post could have a completely unique set of metadata compared to that of its siblings. Let’s look at a few examples.

Read more

Getting started with v1

This post refers to a legacy version of Siteleaf.

Watch Getting started with v1 on Vimeo

In this video, we show you around the Siteleaf interface and create a simple website.

Watch Getting started with Siteleaf.

Hello World, I’m Siteleaf

This post refers to a legacy version of Siteleaf.

Hello World, I’m Siteleaf

Last week, I ran through a number of Siteleaf’s most compelling features and provided a general overview of the service. This week, I’ll hold your hand through creating a basic website using Siteleaf.

Read more

Siteleaf overview

This post refers to a legacy version of Siteleaf.

Siteleaf overview

Recently, we at Oak launched a new website publishing platform, called Siteleaf. In short, Siteleaf lets you build your website locally, edit its content in the cloud, and publish to static. In between, it’s so much more. Let me tell you about it.

Develop locally

As the one who makes the websites, you undoubtedly have a dev environment you prefer. All your code is version-controlled, your snippets are award-worthy, and you are one with your text editor. With Siteleaf, there’s no online WYSIWYG editor forced upon you, so you can build your website in the comfort of your own IDE. Use the Siteleaf gem to preview your templates locally using the data from the live server. When you’re ready to go live, simply push the files with the gem or upload them using the website. You can even use Pow or Anvil to preview your sites with a proper hostname.

anvil

Read more