Jekyll

Upgrading to Jekyll 4

Jekyll 4.0 is out in the world, and brings upon many improvements over 3.x.

Notably, your site should build much faster now thanks to super-powered caching and content transformations. You can see a full list of changes here.

While GitHub Pages is still pinned to Jekyll 3.8.x, it’s possible to start using Jekyll 4 today with a little help from Siteleaf.

Check out our upgrade guide to get started:
Upgrading from Jekyll 3.x to 4.x

Here’s to speedy rendering! 🍃

How to check your site for broken links

Clicking on links that are broken is a bad experience for users, and it can even affect your SEO. Thankfully, it’s really easy to automate the process of checking the links on your site using html-proofer.

You can install html-proofer however you like, for the sake of argument we’ll use bundle by adding the following to your gemfile:

gem 'rake'
gem 'html-proofer'

And then run bundle install. Then you can get html-proofer to check for any broken links using the following commands:

bundle exec jekyll build
bundle exec htmlproofer ./_site`

Then you’ll receive a breakdown of every external and internal link which is broken. Go forth and fix things! Hat’s off to Super Tech Crew for this tip. 

SEO with Jekyll and Siteleaf

SEO (Search Engine Optimization) helps your website stand a chance of appearing in search engine results and get people organically discovering your site.

Here are our top tips to consider when optimizing your Siteleaf site’s SEO:

Sitemap

Sitemaps can help search engines find information and content on your site, especially if your website is particularly big. Sitemaps can be generated with a GitHub Pages-approved Jekyll plugin jekyll-sitemap.

To enable the jekyll-sitemap plugin add the following to your site’s Gemfile:

gem 'jekyll-sitemap'

And run bundle. Then add this to your site’s _config.yml file:

url: "http://example.com" # the hostname & protocol for site
plugins:
   - jekyll-sitemap

Save, publish, and you’re done! This will automatically create a /sitemap.xml for you.

Read more

Making your first Jekyll theme: Part 2

This is a guest post by David Darnes, creator of the Alembic theme.

In Part 1, I gave an overview of creating themes for Jekyll and a few tips for when you’re developing your own theme. In this second part, I’m going to give a full step-by-step guide to developing your own Jekyll theme gem.

Getting Setup

Before we get stuck in, you’re going to need a couple of things. It’s good to have at least a basic understanding of Jekyll; the file structure is very similar to making a Jekyll site, as is the development process. Unsurprisingly, you’ll actually need Jekyll as well, which can be installed using Ruby. For Mac users, this will be quite straightforward, as Ruby comes preinstalled. This means you can just use the following command in your command line tool of choice:

$ gem install jekyll

You can use the following article if you’re trying to install Jekyll on a Windows machine.

If you’re planning for your user base to use Siteleaf or GitHub Pages, you can install the official GitHub pages-gem, but make a note of the specific gems you’re using, as you’re going to need them later in the development process. You should also install Bundler, which will help you to manage all the gems you are using in your gem theme.

Finally, create an account on RubyGems.org - you’ll need this account later on when you want to submit your theme gem so others can install it easily.

Read more

Introducing remote themes

Some exciting news! GitHub Pages has announced support for loading remote themes from any GitHub-hosted repository. This is also supported on Siteleaf as of today, whether you publish to GitHub or anywhere else.

Remote themes are similar to Gem-based themes, but do not require Gemfile changes or whitelisting. This means you can now use any of the hundreds of community-curated themes available on GitHub.com, or create your own without having to publish a Gem.

Jekyll themes package layouts, includes, and stylesheets in a way that can be overridden by your site’s content. It’s a great way to maintain a separation of content and code, and makes it possible to share themes across multiple sites.

Read more

Making your first Jekyll theme: Part 1

This is a guest post by David Darnes, creator of the Alembic theme.

By nature, any well structured site that has easily editable content is ‘themeable’ — a layer, or skin, that presents content in the way the owner or creator intended; Jekyll is no different. Pages, posts and any other form of formatted content can be segregated from the templating files.

Themes for Jekyll have been around for a while, but the process of installing a theme was a bit clunky. Content files and templating files would have to be carefully copied over. But, with the introduction of Gem-based themes, themes can now be installed with a couple of lines of code.

Read more

Jekyll 3.5.2 is here

Recently GitHub Pages upgraded to Jekyll 3.5.2, and we’ve now made it our default to match.

This update includes a few enhancements and bug fixes, most notably one which should dramatically speed up generation of your site! In testing jekyllrb.com, generation went from 18 seconds down to 8.

For a full list of revisions check out the release notes.

If you are still using Jekyll 3.4, here’s everything that’s new in 3.5 so far:

  • Jekyll now uses Liquid 4, the latest! It comes with whitespace control, new filters concat and compact, loop performance improvements and many fixes.
  • Themes can specify dependencies and Jekyll will require those. This makes it easier for theme writers to use plugins.
  • The gems key in the _config.yml is now plugins. This is backwards-compatible, as Jekyll will gracefully upgrade gems to plugins if you use the former.
  • Filters like sort now allow you to sort based on a subvalue, e.g. {% assign sorted = site.posts | sort: "image.alt_text" %}.
  • You can now use tab-separated data files.
  • Using layout: none will now produce a file with no layout. Equivalent to layout: null, with the exception that none is a truthy value and won’t be overwritten by front matter defaults.
  • Dramatically faster site generation!
  • Lots more bug fixes.
Read more

More approved plugins

Hot on the heels of the Jekyll 3.3.1 update earlier this week, four additional plugins have been approved for GitHub Pages.

These plugins are specifically geared toward software documentation and open source code projects on GitHub, but may come in handy for any type of website.

Read more

Jekyll update & new approved plugins

We have updated our default Jekyll version from 3.3.0 to 3.3.1, to match the recent update at GitHub Pages.

This update includes a few minor enhancements and bug fixes. For a full list of revisions check out the release notes.

Also included in this update are two new approved plugins.

Read more

JAMstack e-commerce with Siteleaf & Snipcart

This is a guest post by Charles Ouellet, co-founder of Snipcart.

If you’re reading this blog, you know static web development is trendy, to say the least. Unless you just got out of a years-long meditation retreat in a cave with no Internet. If that’s your case, well, hum, welcome back!

At Snipcart, our developer-first shopping cart platform, we’ve been diving into static site generators and related tools for 2+ years now. And we believe they are the next big thing.

A short while ago, a friend of ours gave an in-depth conference on why “static” is a bad word for the modern front-end stack, aka the JAMstack (JavaScript, APIs, & Markup).

And he’s right:

Static definition

There’s nothing “undesirable” or “uninteresting” about the modern static websites & apps developers are pushing online. It’s in fact quite the opposite.

As a community, we need to give this new paradigm a name worthy of its actual value, and that’s exactly what the JAMstack is.

But this post isn’t a philosophical essay on the benefits of the API economy and the modular development approach. It’s about putting together a killer e-commerce workflow that ticks all of the boxes on the JAMstack checklist:

  • Entire site on a CDN
  • Atomic deploys
  • Instant cache invalidation
  • Everything lives in Git
  • Automated builds

So today, I’m going to show you how to build an API-centric, fast and secure e-commerce project in 5 simple steps. And I’m going to use the right JAMstack tools to do so.

Let’s do it!

Read more

Creating tag pages with Jekyll and Siteleaf

In this tutorial, we show you approaches for creating tag pages in Jekyll and Siteleaf.

This is part two of a tutorial series on Jekyll and Siteleaf. Check out part one on author pages.

The plugin approach

If you plan to use more than a dozen or so tags, a plugin can save you from having to create individual documents for each. This approach lets authors and content managers easily create new tags on the fly, while having autocomplete available in the Siteleaf UI.

Read more

Creating author pages with Jekyll and Siteleaf

At Oak, we recently launched a new website for our friends at Collaborative Fund, built on Siteleaf. The site features a blog for their prolific content, including author and tag pages.

In this tutorial, we show you how to set up your Jekyll blog with author pages and leverage Siteleaf to maintain your content.

The approach we use in this tutorial can be easily adapted to other sets of content as well, not just authors. It also is plugin-less, which means it can be readily published to GitHub Pages on Siteleaf’s free Developer plan.

Read more

Jekyll environments

When working with Jekyll and Siteleaf, you typically have 3 distinct environments to help you code, preview, and publish your site:

  1. development - this is your local machine where theme development takes place. Run jekyll serve and your site will be accessible at http://localhost:4000.

  2. staging - sites on paid plans come with preview functionality. Hit the “Generate preview” button in Siteleaf, and your site will be built with a unique URL without affecting your live site. This URL is shareable, so you can send it to colleagues outside of Siteleaf for feedback or proofreading.

  3. production - where your final website is generated and hosted. This could be GitHub Pages, Amazon S3, Rackspace Cloud Files, or any host that supports (S)FTP (DigitalOcean, MediaTemple, etc).

Starting today, Siteleaf will now set the {{ jekyll.environment }} variable to one of the environments above (previously both preview and publish used production).

Read more

Jekyll Plugins and Themes are here 🎉

Today’s the day! We’re excited to update to Jekyll 3.2, which brings over 100 improvements including Gem-based themes.

In addition to themes, we’re extremely happy to introduce support for third-party Jekyll plugins. Sites on the new Team, Business, and Enterprise plans can now install and leverage custom plugins to extend the functionality of Jekyll and Siteleaf. As always, GitHub Pages-approved plugins are supported on all other plans.

Sites on the free developer plan can make use of the new GitHub Pages-approved Minima theme, while all paid plans (including legacy and Personal plans) can take full advantage of custom themes. Themes package layouts, includes, and stylesheets in a way that can be overridden by your site’s content. It is a great way to maintain a separation of content and code, and makes it possible to share themes across multiple sites.

We also gave the Jekyll build process a nice speed boost across the board. In some cases, you may notice your site building up to 2x as fast!

Read more

Customizing the Siteleaf admin

Watch Customizing the Siteleaf admin on Vimeo

Siteleaf v2 was built to be customized. In this tutorial, we’ll dive deeper into the Siteleaf admin and learn some tricks on how to tweak the interface to suit our needs. We’ll cover collections, permalinks, metadata, smart fields, defaults, and user roles.

If you followed the previous tutorials, you should now have a basic understanding of Jekyll and the Siteleaf admin. Feel free to check those out first if you haven’t.

Watch the video above, or follow along with the text version below.

Collections

By default, you should have 2 content areas: Pages and Posts.

Pages is your home for standalone content like your about page, contact, FAQ, and so on. Pages can be drag and drop ordered, and nested using the move icon next to each page.

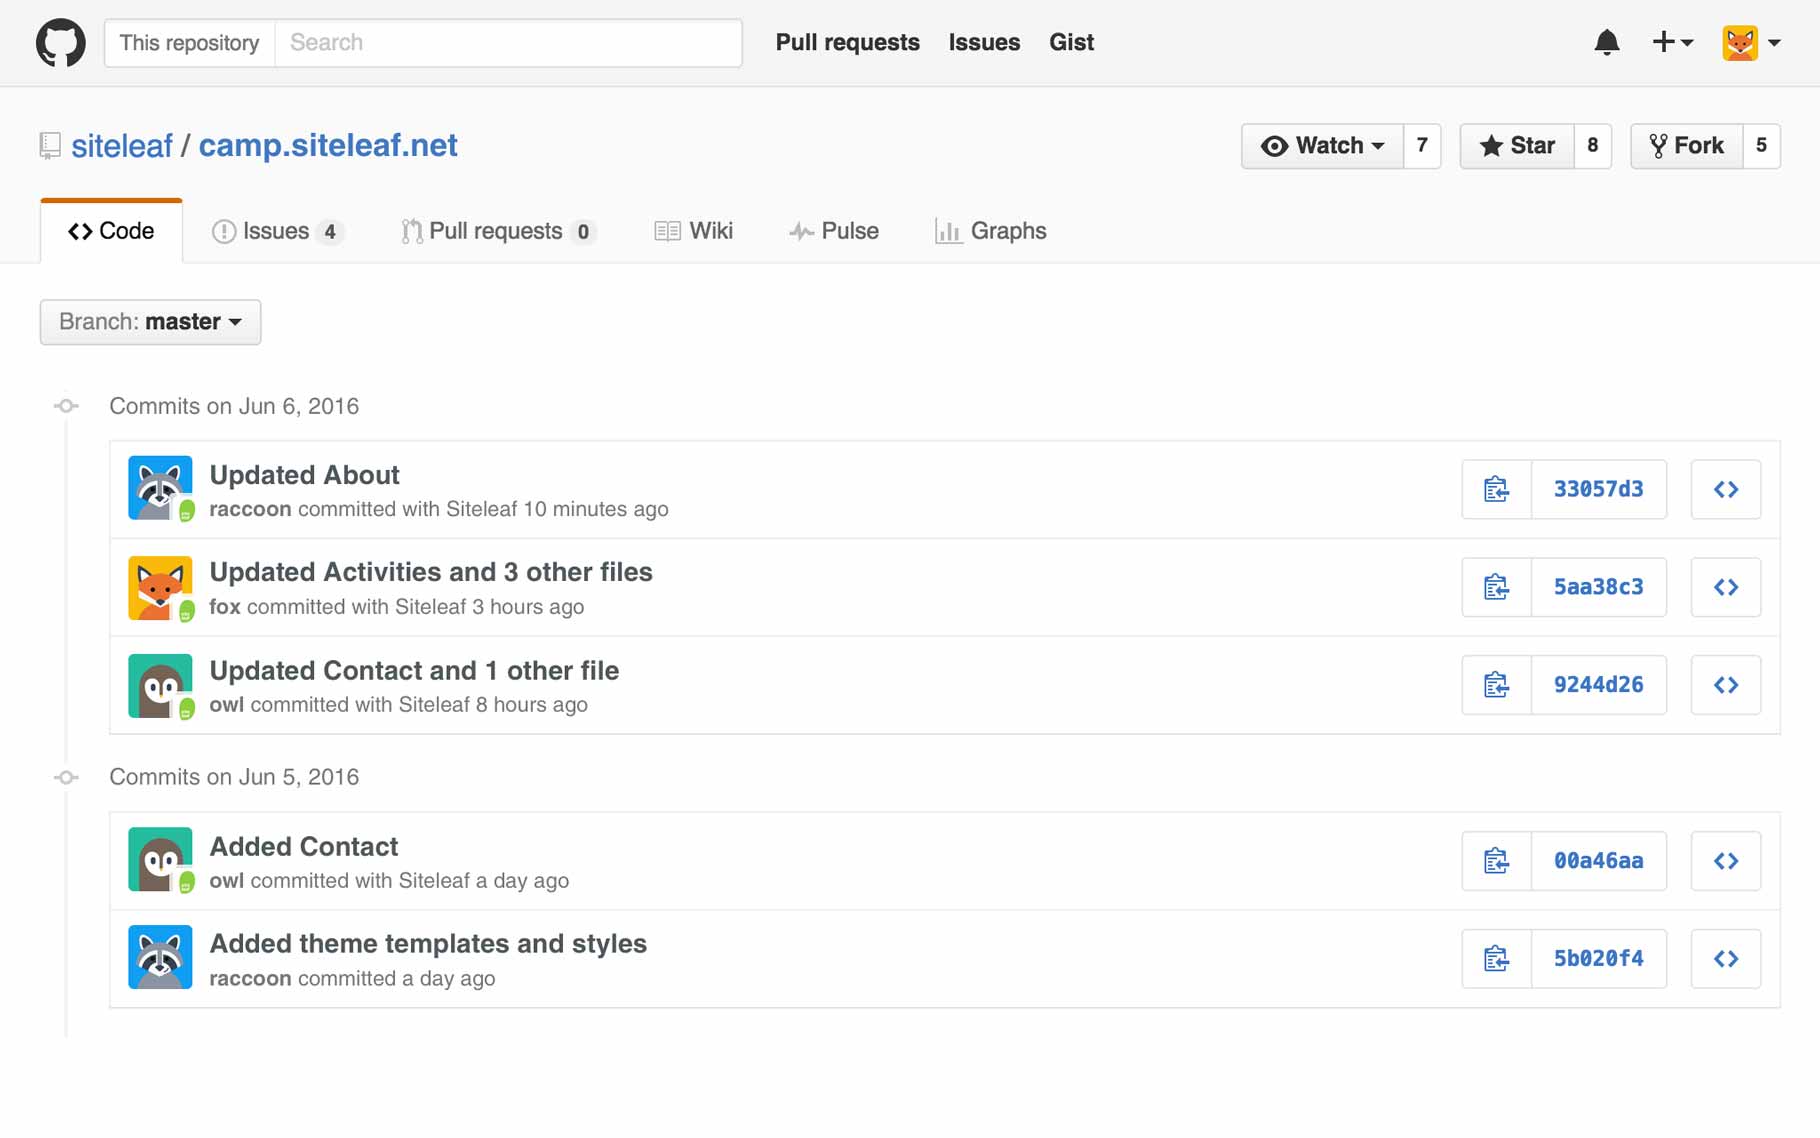
Posts is a default Jekyll collection that’s blog-aware, so each piece of content here (called documents) is stamped with a date, and generally shown in date-descending order.

The Posts collection also comes with some special features: drafts, tags, and categories.

If these features are useful to you, but the name “Posts” isn’t quite doing it for you, you’re welcome to rename this collection under Collection settings. For example, I might want to call mine “Stories” instead.

Read more

Connecting GitHub and Siteleaf

Watch Connecting GitHub and Siteleaf on Vimeo

This tutorial will show you how to connect and sync an existing Jekyll site from GitHub to Siteleaf, so you can edit content and preview your site in the cloud.

If you are new to Jekyll, you may want to start with our Jekyll from Scratch first tutorial to catch up on the basics.

What is GitHub sync?

When developing your site, you’ll generally want to keep your theme and content in sync so you can see how everything looks in context.

By enabling GitHub sync, any changes you make in your Git repo will be immediately saved to Siteleaf, and vice versa. So any edit you or anyone on your team makes in Siteleaf is synced and backed up. You can see a log of all changes in GitHub, and revert to any state in case anyone makes a mistake.

We like to think of it as a time machine for your content.

Read more

Jekyll from scratch

Watch Jekyll from Scratch on Vimeo

This tutorial was created using Jekyll version 3.1.6. Newer versions (3.2+) will give you a theme by default instead of _layouts and _includes. For the purpose of this tutorial you may want to downgrade to Jekyll 3.1.6 (to remove other versions, run gem uninstall jekyll). Stay tuned for a future tutorial on themes!

In this tutorial, we’ll show you how to get set up and develop websites locally using Jekyll. We’ll cover installation, creating a new site, file structure, and finally we’ll commit the new site to GitHub.

This will give you a functional website that you can edit offline. Also make sure to check out the next tutorial where we’ll connect our site to the new Siteleaf v2 so we can edit content in the cloud.

What is Jekyll?

Jekyll is a static website generator built on Ruby. It takes Markdown text (your site’s content) and Liquid templates (your site’s theme) and outputs simple HTML that can be hosted pretty much anywhere.

It’s also what powers GitHub Pages, which serves more than half a million websites.

Getting started

To get started, we are going to install Jekyll, which is available to download as a Ruby gem. We’ll be following the quick-start instructions on Jekyll’s website.

So let’s open the trusty command line.

First, you’ll want to make sure you are running a recent version of Ruby. You can confirm by running the following command:

$ ruby -v

The latest stable version is 2.3.1, but anything above 2.2 should be fine. If you need to upgrade, we recommend using something like rbenv to make it easy.

Read more